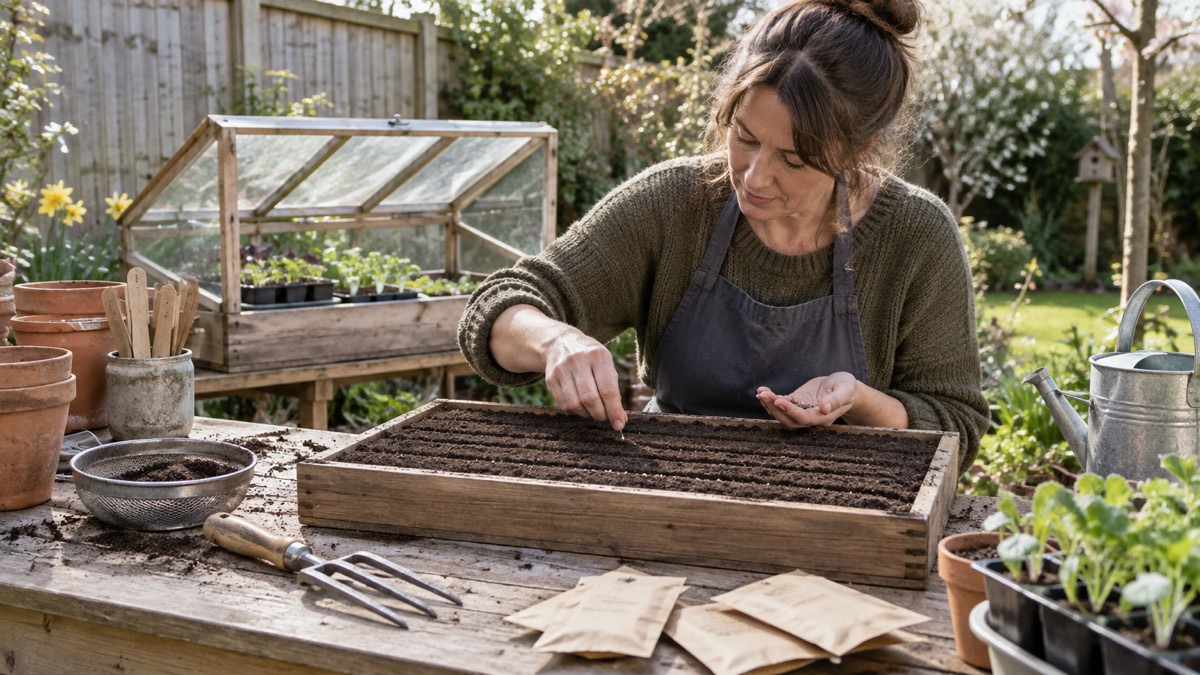
Sowing a seed is a simple act, but the difference between a row that germinates and a row that fails usually comes down to three things: how deep the seed goes, how wet the compost or soil stays, and whether the seedlings stay healthy in their first weeks. Most vegetable and flower seeds are sown either directly into the ground in a shallow drill, or into pots and trays under cover and then transplanted. Both methods are covered here, step by step.
The depths are small. Small seeds are sprinkled sparingly along the drill with finger and thumb1; large seeds are sown one at a time, either along the drill or into holes made with a dibber1. Indoors, the same rules apply with a tray of compost instead of a drill.
Sowing seeds directly into the ground
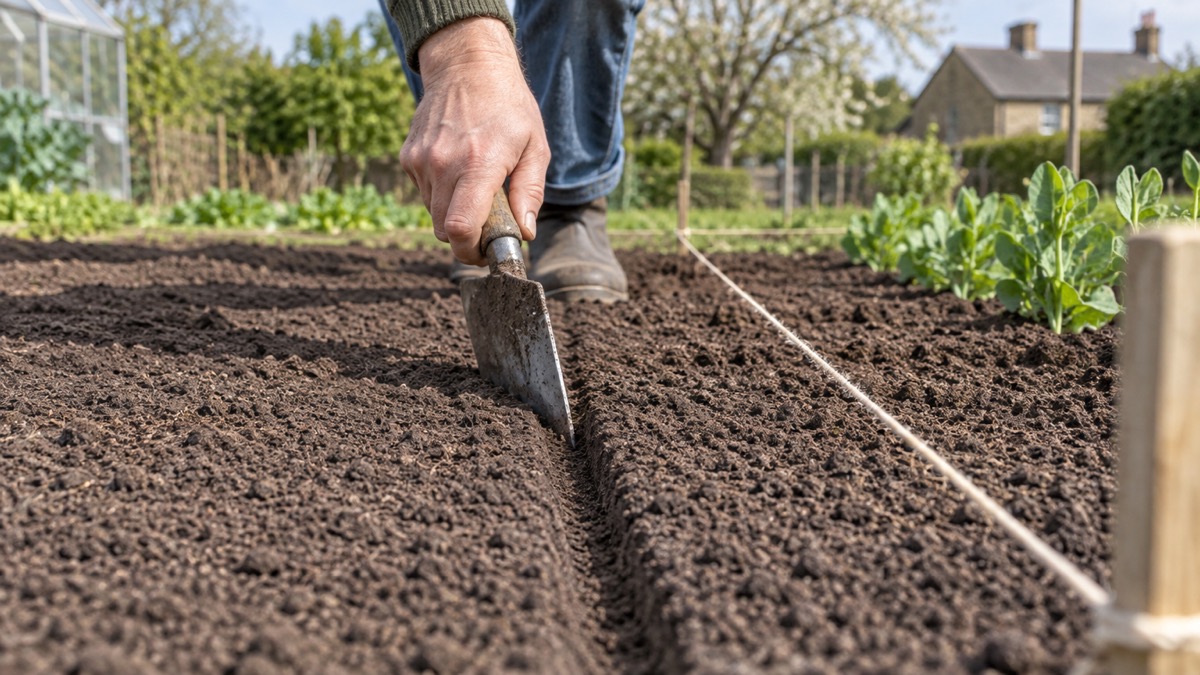
Direct sowing means sowing where the plant is to grow, with no transplanting. It suits crops that germinate reliably in open soil and dislike root disturbance, and it is the simplest way to start growing food. Before you sow anything, get the soil ready: remove old plant material and weeds, digging out all the roots and shoots, shaking the soil back over the beds and composting what you can3. Weed-free, fine soil matters more than anything else you do at sowing time, because tiny seedlings cannot compete with established weeds, and lumpy soil leaves seeds either buried too deep or exposed.
You will need a trowel, hand rake, dibber, measuring stick, gardening gloves, a watering can, labels and a waterproof pen or pencil, and sticks or straws to mark the rows1. The basic method is to draw out a shallow drill (a narrow groove in the soil) at the depth the packet asks for, water it if the soil is dry, sow the seed along it, then cover the seed with fine soil and firm it gently.
Small seeds: sprinkle sparingly along the drill
For small seeds, the RHS advises you to use your index finger and thumb to pinch a small amount of seed and sprinkle it very sparingly along the drill1. Sowing thinly matters because seedlings that come up crowded have to be thinned, and thinning wastes seed and disturbs the roots of the plants you keep. Carrots are a good example of the principle: sow the seed thinly and thin to three inches apart for larger roots4.
A useful trick with very small seeds is to empty the packet into a small pot and mix the seed with sand, so you can see where the seed has landed in the drill1. If seeds are very small when you are sowing in pots rather than drills, a seed sower, a small hand-held dispenser, helps you place them one by one2.
Large seeds: station sowing with a dibber
Large seeds can also be sown individually using a dibber to create a hole for the seed. This is known as station sowing1. Alternatively, sow them along the channel using a spacing stick to measure the distance between each seed1. Broad beans show how forgiving large seeds are: the extra-large seeds are easy to sow, just push them into the soil or a pot of compost, and they will usually germinate with no problems. Courgettes are sown a couple of seeds per station, around 2.5cm deep, and watered in well5.
Parsnips take station sowing a step further: sow three seeds at 15cm (6in) intervals, 13mm (0.5in) deep, in rows 30cm (12in) apart, preparing the drill and watering lightly before sowing6. Sowing three seeds per station insures against gaps where one seed fails, and the extra seedlings are thinned to leave the strongest.
Marking rows and labelling
Label every row as you sow it, with a waterproof pen or pencil1. A few radish seeds sown in the same drill as slow-to-germinate seeds such as carrots or parsnips will mark the rows, because radishes come up quickly, so you know where to weed and where to leave alone. Weed the area well before sowing chives in particular, because tiny chive seedlings can be mistaken for blades of grass and uprooted by mistake when weeding7.
How deep to sow: a quick reference
Depth is where most sowing goes wrong. A seed buried too deep runs out of energy before its shoot reaches the light; one left on the surface dries out or is eaten. The packet is the authority for the variety you have, but the figures below, all from makers' and independent growing guides, show how little variation there is within a crop type.
| Crop | Sowing depth | Where sown | Source type |
|---|---|---|---|
| Radish | Near the surface, sprinkle a little soil over | Outdoors or in containers | Maker |
| Salad leaves | About 1cm, in shallow drills | Outdoors | Independent8 |
| Sunflower | Around 1cm | Direct outdoors | Maker9 |
| Cucumber | 1cm (half an inch) | In pots | Maker10 |
| Parsnip | 13mm (0.5in) | Direct outdoors, in rows 30cm apart | Maker6 |
| Cauliflower | Around 2cm | Outdoors in drills | Maker |
| Courgette | Around 2.5cm | Direct outdoors, 2 seeds per station | Maker5 |
The pattern is consistent: the smaller the seed, the shallower the sowing. If a packet gives a range, take the shallower end in heavy soil, which caps and crusts more than light soil, and the deeper end in dry, sandy soil where the surface dries fast.
Sowing under cover: pots, trays and propagators
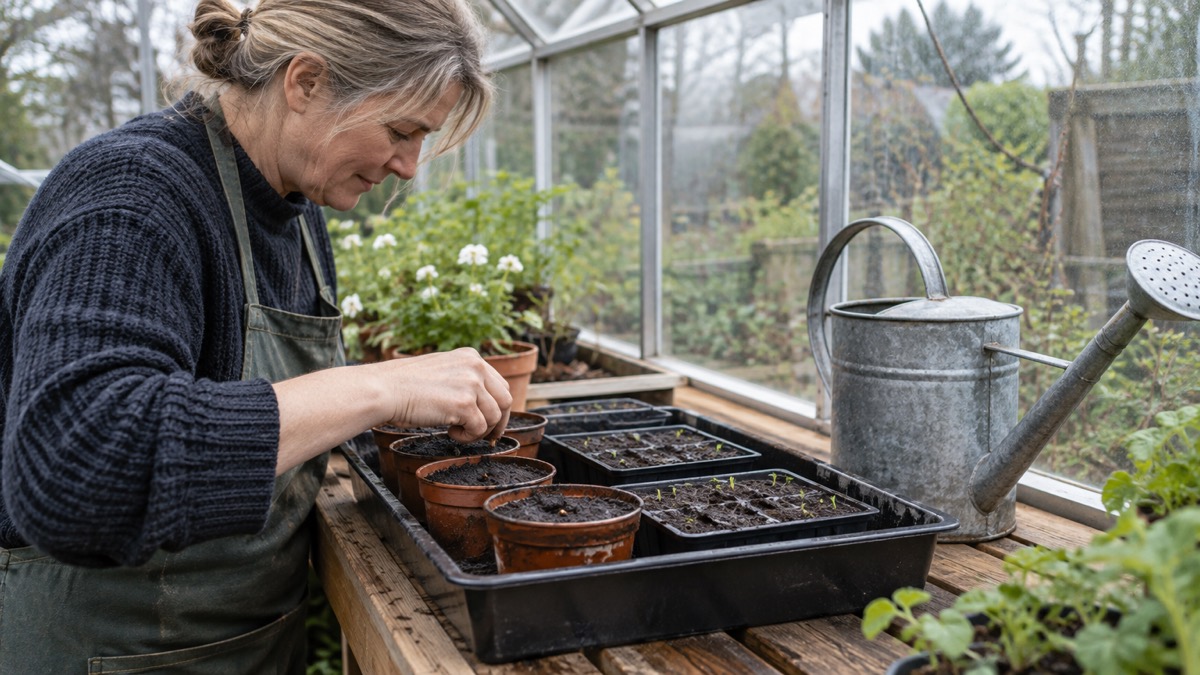
Sowing in pots and trays lets you start crops earlier than the outdoor season allows, protect slow or tender seedlings, and raise plants for a greenhouse or polytunnel. The method the RHS teaches for pots is straightforward. Fill the container with compost, overfill it, and tap it gently on the table or work surface three times, which removes any large air pockets2. Then level off the surface and sow.
For small seeds, sprinkle the seeds on top of the compost, allowing space between them, and sieve a thin layer of compost over them2. Large seeds go in individually, pushed in at the depth the packet gives. Cucumber seeds have a specific trick worth knowing: sow the large seeds singly on the edge of pots to prevent rotting, 1cm deep, three to a small pot10. Sitting the seed on its edge rather than flat stops water pooling on it.
Watering newly sown pots is done from below or with a fine rose: either place the pots in a tray of water and allow the soil to absorb the water, or carefully use a watering can with a rose head2. Watering from above with a heavy stream can wash small seeds into one corner or bury them too deep.
Which compost to use
Seed compost or multi-purpose compost will do fine for sowing in pots. Seed compost is lower in nutrients and finer in texture, which suits germination; multi-purpose is more versatile if you only want one bag. If you make your own leafmould, well-sieved leafmould on its own, or mixed with equal parts sharp sand, makes a low nutrient, fine-structured medium for seed germination11. Whatever you use, make sure containers drain: check that pots and window boxes have plenty of drainage holes in the bottom, and drill some more if they have not12.
Keeping seeds warm and moist
To keep seeds warm and moist, add a clear plastic lid to your tray; an upcycled clear food tray works well as a propagator lid13. Put the container on a warm, sunny windowsill or in a bright indoor space, and keep the compost moist but not soggy while the seeds germinate13. Chives show the range of options: sow onto the surface of pots or trays of seed-starting potting mix, cover lightly, then place in a heated propagator or on a sunny windowsill covered with glass or clear plastic7. If you are deciding whether warmth is worth it for what you grow, see our comparison of a heated or unheated propagator.
When to sow: timing through the year
Sowing too early is the most common timing mistake, and it fails in a specific way. With parsnips, some seed packets state to start sowing in February, but this can lead to failure if the soil cools down again after a warm spell; sowings made in March and April, and even early May, will do much better6. Cold soil after a mild spell either rots the seed or leaves it sitting dormant while pests find it. Wait for sustained warmth rather than a single mild week.
The pattern across crops is that tender and slow crops start indoors early, and hardy crops go out later:
- Celeriac: sow in March, indoors, into a seed starting potting mix, covered only lightly14
- Tomatoes: sow from mid-January to early February in a heated greenhouse, or late February to mid-March in an unheated greenhouse15
- Beetroot: if sowing in early March, cover the seeds with frost protection, even inside the polytunnel, to reduce frost damage to seedlings16
- Sunflowers: sow direct in late April or May, once the last frost date has passed and the soil has warmed9
- Calendula: sow indoors a few weeks before the last frost date, or direct sow after it, or simply buy as bedding plants17
- General vegetable sowing: from April onwards you can start sowing seeds for the year's crop of vegetables18
Two refinements make timing work harder for you. First, sow in small batches rather than all at once: wherever you sow cabbage seeds, do so only in small batches, so that you get a staggered harvest and do not end up with everything ready at once19. Second, use successional sowing for cut-and-come-again crops: salad seeds can be sown continuously through the summer, at weekly intervals, to keep you in fresh leaves for months8. For a month-by-month plan, see our monthly sowing checklist.
One crop has a timing warning that works the other way. Celery plants can be prone to bolting later if exposed to lower temperatures at the early seedling stage of their life, so do not rush celery out into cold conditions even when germination has gone well.
Germination: getting seeds to come up
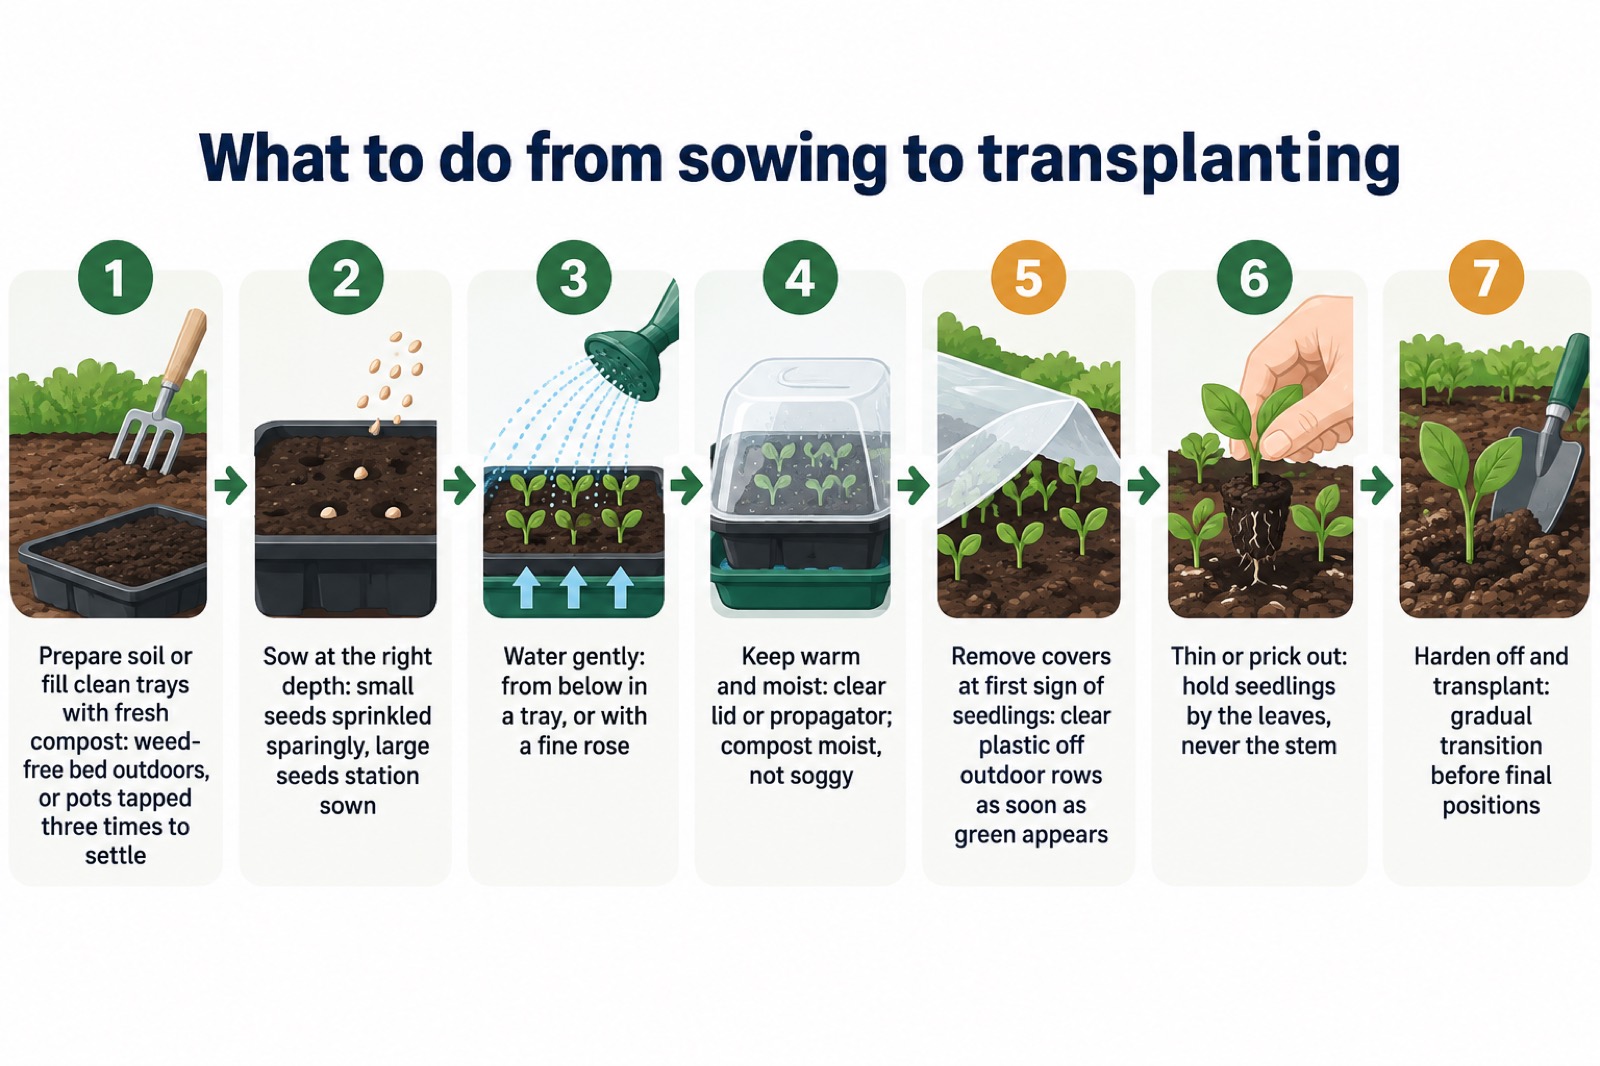
A seed germinates when it has moisture and warmth in steady supply. Outdoors, a very cheap way to enable earlier germination is to cover the sown ground with a sheet of clear plastic, removing it as soon as the seedlings appear20. The plastic warms and dries the surface less than you might fear, but seedlings under plastic cook quickly once the sun comes out, which is why it must come off at the first sign of green.
Indoors, the same conditions come from a bright windowsill or propagator and careful watering. Moisten the compost before sowing, using a watering can with a fine rose; it should be damp but not waterlogged13. After sowing, keep the compost moist but not soggy while the seeds germinate13. For parsley, keep the soil or growing medium moist while allowing excess water to drain away freely; undercover watering is the main job21.
When you do water established seedlings and plants, target the base of the plant and its roots rather than spraying the leaves, because the roots take moisture from the surrounding soil or compost22. Wet leaves in still air, under cover, are exactly the conditions fungal problems enjoy.
Pricking out, potting on and transplanting
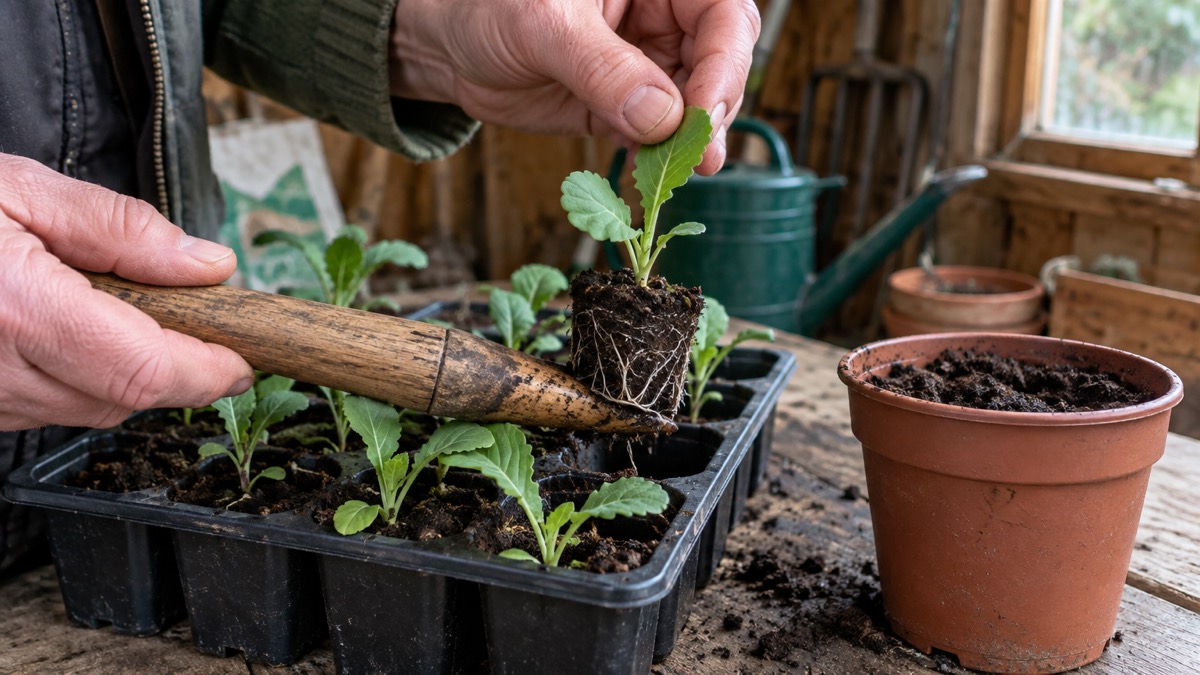
Seedlings sown in trays eventually need their own space. Modules are small individual cells, usually in a tray, used for sowing seeds, and the resulting seedlings can be transplanted with minimal root disturbance23. If you sow in a shared tray instead, you will need to prick out, which means lifting each seedling and moving it to its own pot or module.
The safety rule that matters here comes from the RHS: ALWAYS hold the seedling by its leaves, never by the stem, when lifting it with a dibber, pencil or label poked in under the seedling23. A crushed stem does not recover; a leaf, even a damaged one, is far less critical. Before you start, tap the tray on its edges to loosen the seedlings a little23.
When to move them depends on the crop. Tomatoes are transplanted into 7.5 to 9cm (3 to 3.5in) pots when two true leaves have formed15. Celeriac seedlings are pricked out and potted on into individual pots or soil blocks of multi-purpose potting mix once large enough to handle14. Herb seedlings can be moved as soon as they develop a leaf, with the most promising ones going into a stronger compost mixture in pots or window boxes12.
Hardening off before planting out
Plants raised indoors must be introduced to outdoor conditions gradually. Cape gooseberries show the full sequence: sow indoors in a warm space in early spring, then place into the polytunnel once all risk of frost has passed in your area, hardening off the plants before their final growing positions. Hardening off means putting plants outside during the day and bringing them in at night, or placing them under cover, over a period of days, so that wind, sun and cooler nights do not check their growth.
Where soil carries a disease, a larger transplant gives the plant a head start. If clubroot is known to be present, grow new plants on in healthy soil to a larger than normal size before planting out, so they begin growth in the affected soil with a larger than usual healthy root system24. Our page on clubroot covers that disease in full.
Damping off: the seedling killer to prevent
Damping off is a fungal problem that attacks seedlings at soil level, and it can kill seedlings of every kind, vegetables and flowers alike. It is most often seen in trays of seedlings grown undercover, where the air is still and the compost stays wet. Basil is one crop where the maker specifically warns of it: growing undercover, basil can suffer powdery mildew, grey mould or damping off in seedlings.
The first sign is usually patches of seedlings that have collapsed together in the tray, with shrivelled stems at or just below the surface, and roots that have rotted. Once a seedling has collapsed it cannot be saved. The defence is prevention, and prevention is about three things: cleanliness, watering and air.
Damping off comes mostly from the soil
The fungal organisms that cause damping off live in soil and old compost, which is why the problem so often appears in trays rather than in open ground. Fresh, clean compost in a clean tray is the starting point; residue from a previous batch of seedlings is the most likely route in. That applies to benches as well as pots: keep greenhouse benches and potting surfaces clear of old compost and plant debris between batches.
Preventing damping off: clean pots, trays and benches
- Wash pots, trays and modules thoroughly between sowings, and never reuse old compost for sowing
- Fill containers with fresh compost from a newly opened bag
- Keep benches and potting surfaces free of spent compost and plant debris
- Water from below or with a fine rose, and let excess water drain away freely2
- Keep the compost moist but not soggy; damp, never waterlogged13
- Sow thinly and prick out promptly, so seedlings are not crowded in still, damp air25
Fast-growing flower seedlings are among the most at risk, because they come up densely and quickly in trays, creating exactly the crowded, humid conditions the fungus likes. The same care applies to them as to vegetables: clean containers, fresh compost, careful watering and air movement.
If a batch is lost, sow again rather than trying to nurse survivors. Sowing in small batches, as advised for cabbage19, means a single failure costs you a week rather than the whole season, and successional sowing at weekly intervals for salad crops8 has the same effect: there is always another batch coming.
Where to go next
Once seeds are sown and growing, the work shifts to watering, planting out and protecting what you have. Our guide to growing your own vegetables covers the whole season from seed to harvest, and the seed sowing equipment checklist lists everything you need before you start. For growing under cover, see polytunnels and greenhouses; for indoor growing on a windowsill, see how to grow microgreens. If you end the season with more seed than you started with, our pages on saving vegetable seed and storing saved seed explain what to keep and how, and a seed viability test tells you whether old seed is still worth sowing.
Sources (25)
- Direct seed sowing, RHS School Gardening, RHS, 2026
- Sowing in pots, RHS School Gardening, RHS, 2026
- Get the soil ready for planting, RHS School Gardening, RHS, 2026
- How to grow vegetables and herbs, Garden Organic, Garden Organic, 2026-10-29
- Courgette, First Tunnels, First Tunnels, 2026-01-14
- Parsnips, Harrod Horticultural, Harrod Horticultural, 2026-11-04
- Chives, First Tunnels, First Tunnels, 2026-01-14
- Quick growing food, Garden Organic, Garden Organic, 2026-10-29
- Sunflower, First Tunnels, First Tunnels, 2026-01-14
- Cucumbers, Harrod Horticultural, Harrod Horticultural, 2026-11-04
- Leafmould, Garden Organic, Garden Organic, 2026-10-29
- Planting herb seedlings, Omlet, Omlet, 2014-10-14
- Growing microgreens, RHS School Gardening, RHS, 2026
- Celeriac, First Tunnels, First Tunnels, 2026-01-14
- Late tomato crop, Harrod Horticultural, Harrod Horticultural, 2026-11-04
- Beetroot, First Tunnels, First Tunnels, 2026-01-14
- Calendula, First Tunnels, First Tunnels, 2026-01-14
- Spring in the worm composting year, Omlet, Omlet, 2026-11-04
- Cabbage, First Tunnels, First Tunnels, 2026-01-14
- Growing year round, Centre for Alternative Technology, Centre for Alternative Technology, 2025-07-02
- Parsley, First Tunnels, First Tunnels, 2026-01-14
- TV gardeners' top tips for saving water in the garden, South West Water, South West Water, 2026-10-28
- How to prick out seedlings into modules, RHS School Gardening, RHS, 2026
- Clubroot problems, Harrod Horticultural, Harrod Horticultural, 2026-11-04
- How to sow seeds successfully, Thompson & Morgan
 Hydroponic System Parts List
 Year-Round Sowing Calendar
 Preserving Equipment Checklist
 Getting an Allotment
 Composting at Home
 Vegetable Pests and Diseases
 Fermenting Vegetables at Home
 Freezing Home-Grown Produce
 Growing Fruit at Home
 Indoor Hydroponics
 Growing Under Cover All Year
 Storing the Harvest