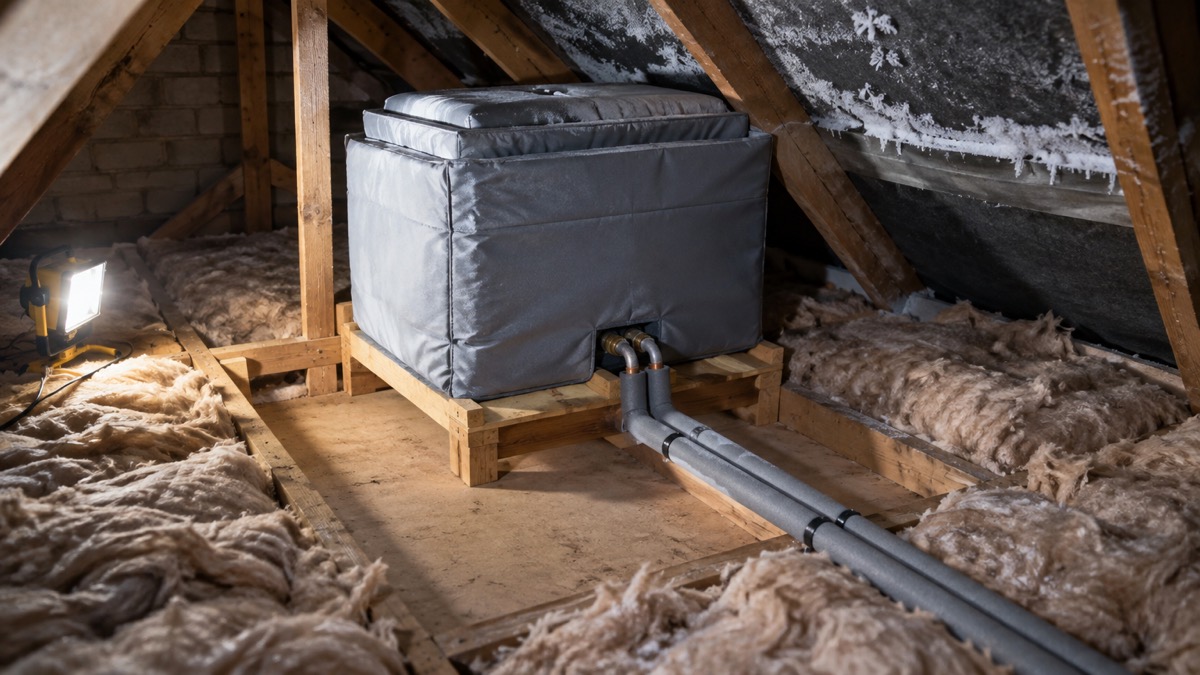
A cold water tank in the loft is one of the most exposed parts of a home's plumbing. It sits in the coldest space in the house, often with nothing between it and the roof, and in a hard freeze the water inside can freeze and the pipes around it can burst. The fix is straightforward: fit an insulation jacket, or wrap the top and sides of the tank with suitable insulation, and lag the pipes that serve it1. The one thing to get right is what you leave bare. Do not place loft insulation under the tank, because that stops heat from the rooms below helping to keep the water in the tank from freezing1.
That single rule is the difference between a tank that stays liquid through a cold snap and one that does not. The warmth rising from a heated room below is what keeps the base of the tank above freezing, so the tank is insulated on its top and sides to hold that warmth in, while the floor beneath it stays clear to let the warmth up1. Get the jacket and the lagging right, keep the lid secure, and check the tank when freezing weather is forecast.
This page sets out what to fit, how to fit it, the mistakes that undo the work, and what to do when a cold snap arrives or the tank freezes anyway.
Fit a jacket or wrap the top and sides
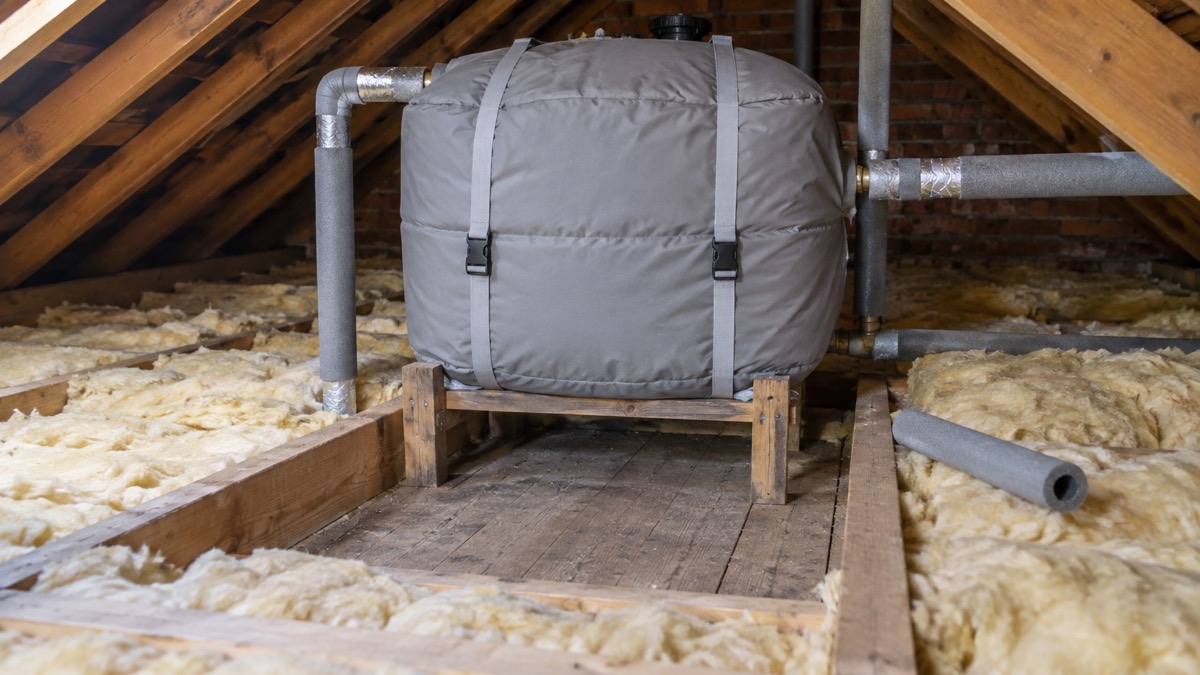
There are two accepted ways to insulate the tank itself, and either is fine. WaterSafe and the water companies say the tank should be fitted with an insulation jacket, or alternatively the top and sides can be wrapped with suitable insulation material1. The aim in both cases is the same: hold warmth around the water while leaving the underside open to the room below.
A purpose-made jacket is shaped to fit over a standard tank and is the simpler option if one is available for your size. As one maker describes its insulated tank product, the insulation jacket is engineered to prevent condensation and effectively reduce thermal and energy loss6. A wrap does the same job with suitable insulation material, provided it covers the top and sides fully and is secured so it does not slip.
Whichever you choose, work through it in this order:
- Turn off the water at the stop tap and drain the tank if you need to move it or work close to the fittings, then check the supply is off by turning on your cold kitchen tap7.
- Fit the jacket over the tank, or wrap the top and sides with insulation, leaving the base exposed1.
- Lag every pipe you can reach, especially those running to and from the tank, wrapping pipes in cold places like a loft or garage with insulation or a lagging kit3.
- Check the lid is tightly fitting and securely fastened, and that no insulation has fallen into the water4.
Leave the loft floor under the tank uninsulated
The most common way to get this wrong is to treat the tank like the rest of the loft floor and insulate underneath it. Guidance from WaterSafe and the water companies is explicit: do not place loft insulation under the tank, because this stops heat from the rooms below helping to keep the water in the tank from freezing1. One water company puts it plainly: do not lag under the tank, as this will prevent heat rising from the house warming the bottom of the tank9.
So the tank is insulated on its top and sides, and open underneath. The floor of the loft around it can be insulated as normal, and should be, because a well-insulated loft keeps heat in the home. One source gives a minimum loft insulation depth of 250mm; the point is a well-insulated loft floor, with a clear patch left beneath the tank. Insulate water tanks and pipes in exposed places or unheated outbuildings, and better still, if not in use, drain them for the winter3.
Why heat from the rooms below keeps the tank from freezing
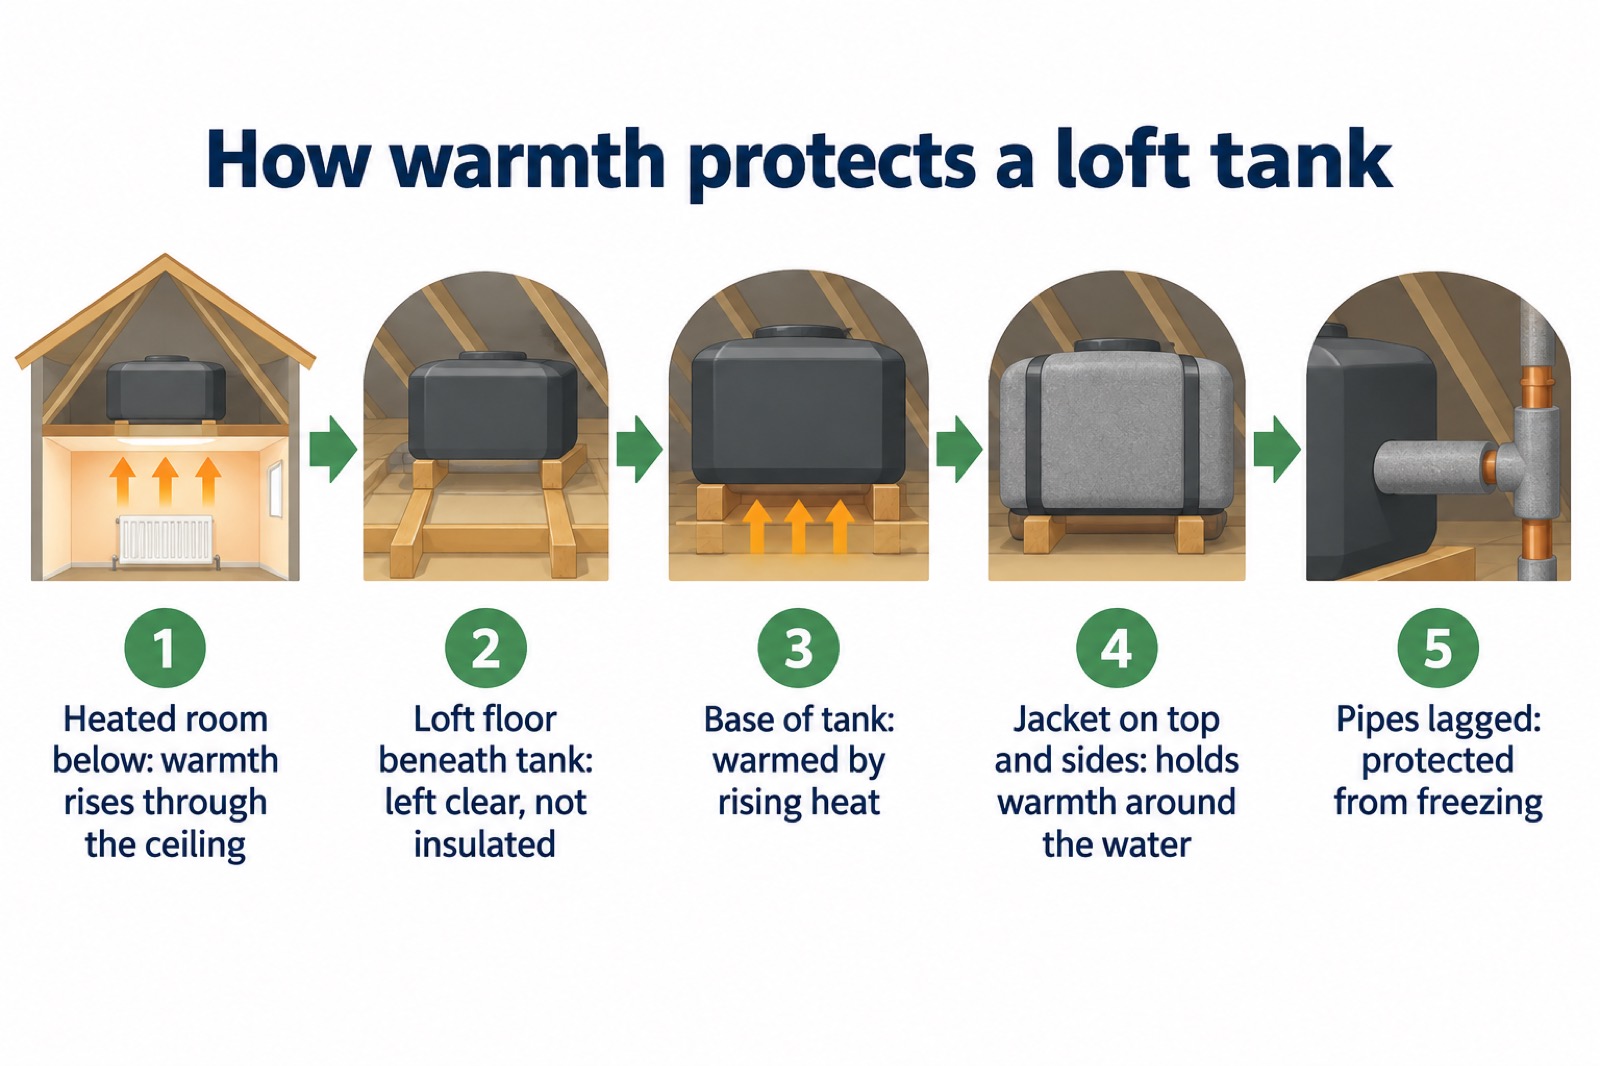
A cold water tank in a loft is kept above freezing not by the insulation wrapped around it but by the warmth of the house beneath it. Heat from the heated rooms below rises through the ceiling and the loft floor and warms the base of the tank. The jacket on the top and sides then holds that warmth around the water, while the open base lets more warmth keep coming up1.
This is why the arrangement is deliberately one-sided. If you sealed the tank all round, including underneath, you would cut off the very heat source that protects it, and the water would be more likely to freeze in a hard cold spell1. The same logic explains why the guidance is consistent across the water companies and WaterSafe: the tank is covered where cold air reaches it, and left open where warmth comes from.
Keeping some heat in the house supports this. WaterSafe advises keeping your heating on at least 14 degrees Celsius overnight and when you are away from home, to prevent pipes freezing5. The government's cold weather advice also points to insulating lofts and cavity walls to keep heat in when it is cold10. A warm house and a correctly insulated tank work together.
Warmth from below reaches the open base of the tank; the jacket holds it around the top and sides.
Common mistakes when insulating a loft tank
Most problems come from a handful of avoidable errors. The first is insulating under the tank, which cuts off the warmth from below and makes freezing more likely1. The second is leaving the pipes bare: the Met Office says water pipes and water tanks in the loft should be insulated with good quality lagging, and lagging protects from freezing and helps insulate your hot water system3. The third is a loose or missing lid, which lets light, birds, vermin and dust into the water4.
| Mistake | Why it matters | What to do instead |
|---|---|---|
| Insulation placed under the tank | Stops heat from below warming the tank1 | Leave the base clear, insulate the rest of the loft floor11 |
| Pipes left unlagged | Pipes can freeze and burst, then flood when they thaw8 | Lag all loft pipes with good quality lagging3 |
| Lid loose or missing | Lets light, birds, vermin and dust into the water4 | Fit a tightly fitting, securely fastened lid4 |
| Tank left uncovered on top | Cold air reaches the water directly1 | Jacket or wrap the top and sides1 |
A further mistake is to ignore the tank until something goes wrong. Check the ball valve to make sure it is not running constantly, which can point to a problem, and watch for overflow from a tank or cistern in the loft12. Overflow water in a cold snap can freeze and block, and a constantly running valve wastes water. A little checking prevents a bigger repair.
Checking the tank in a cold snap
When freezing weather is forecast, a short check of the loft pays for itself. Look at the tank and its jacket, confirm the lid is secure, and check the pipes are still lagged. Check the ball valve to make sure it is not running constantly12. Look for any overflow from the tank or cistern, which is one of the signs of a leak to watch for13.
Know where your stop tap is before you need it. WaterSafe lists the common places as a kitchen cupboard, a downstairs bathroom or toilet, a garage or utility room, a cellar, or under the stairs14. The Met Office winter checklist includes finding your stop tap15. If you ever need to turn the water off, you can check the supply is off by turning on your cold kitchen tap7.
If the loft is very cold, one council advises leaving trap doors open so some warm air can circulate, but only as a temporary measure, because it causes condensation; tanks and pipes should be insulated instead3. Keep the heating on low, at least 14 degrees Celsius overnight and when away, to help prevent pipes freezing5.
What to do if the tank freezes
If the tank or its pipes freeze, act calmly and avoid making it worse. Do not run the system dry. One water company warns that if a cold water storage tank runs dry, an airlock will be created when the water comes back on again, so do not be tempted to drain it17. Keep the heating on to help thaw the pipes gradually, and open the loft trap door temporarily to let warm air circulate if the roof space is very cold3.
If you have a tank in the loft, it will hold some water for a short period during an outage; use it only for critical purposes18. That stored water is a small buffer, not a supply, so plan around it. For more on storing and using water when the mains fails, see Water in an Emergency: A Household Guide.
Once thawed, check for leaks before assuming all is well. Look for overflow from the tank and damp around the pipes13. If you are going away in winter, turn off the water at the stop tap and drain pipes and tanks, and set the heating to come on for short periods daily9. For the wider job of getting a home ready for cold, see Getting Your Home Ready for Cold Weather and Ice.
Sources (18)
- How do I protect against frozen pipes?, WaterSafe
- Protect your pipes, Scottish Water
- Winter proof your home, NI Water
- Water storage tanks and cisterns, Drinking Water Inspectorate
- Winter advice, WaterSafe
- 1050 litre insulated water tank, Enduramaxx
- Unmetered leak test, Wessex Water
- Winter ready, South West Water
- Getting water to your home, Northumbrian Water
- Top tips for keeping warm and well this winter, GOV.UK
- Keeping your home warm in winter, Met Office
- Customer side leaks, South East Water
- How do I know if I have a leak?, WaterSafe
- Locate internal stop tap, WaterSafe
- WeatherReady winter poster, Met Office
- Snow and ice in Cornwall, Cornwall Council
- Protecting your heating systems if your supply fails, Dŵr Cymru Welsh Water
- Failure of water infrastructure or loss of drinking water, Wiltshire and Swindon Prepared
 Car Checks Before Winter
 Flood Warning Checklist
 First Steps After a Flood
 Bedroom Temperature at Night
 Hitting Black Ice
 Car Battery in Winter
 Car Stuck in Snow
 Clearing Snow and Ice Safely
 Clearing Snow from Pavements
 Using Fog Lights
 Signs of Frostbite
 Falling Through Ice
 De-Icing a Frozen Windscreen
 Request or Refill a Grit Bin
 Overtaking a Gritter