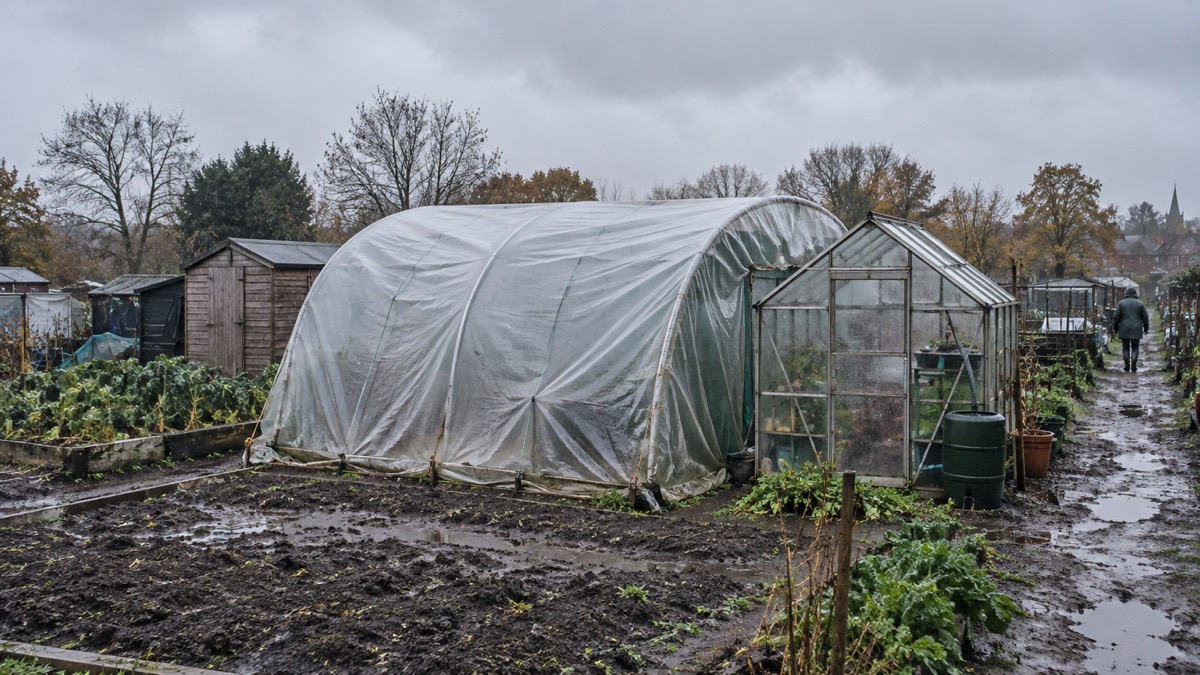
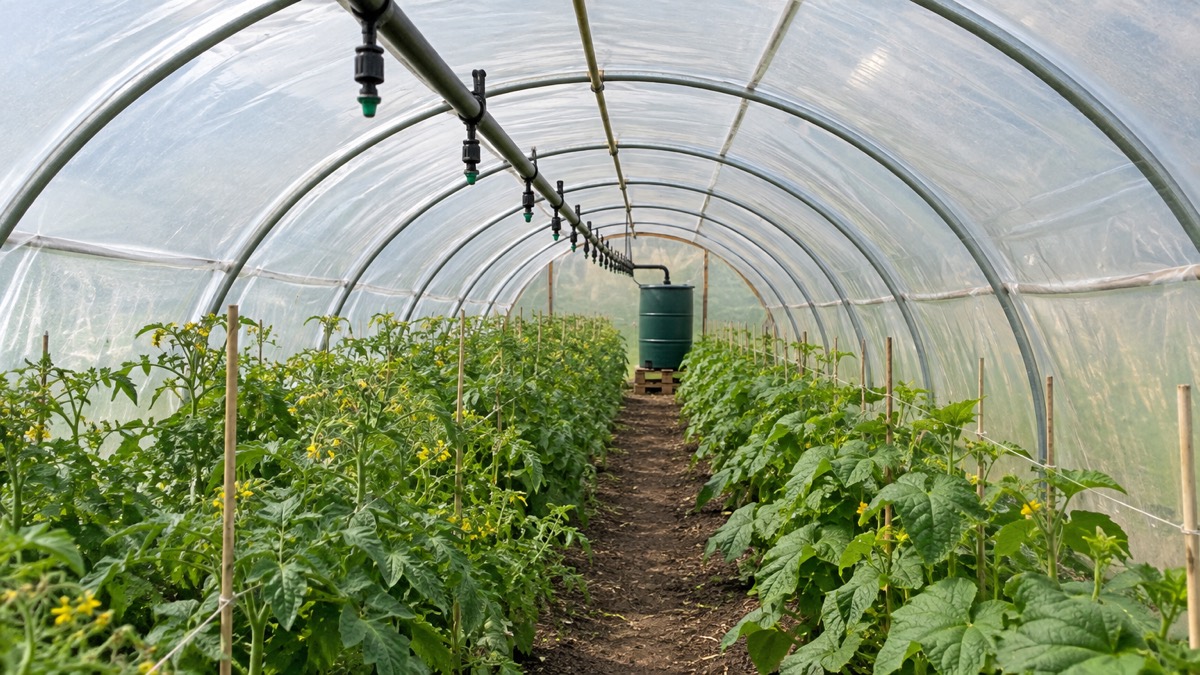
A polytunnel and a greenhouse do the same basic job: they keep warm air and soil around plants and shield them from frost, wind and rain, which is why both are listed among the effective ways to protect a crop1. The practical difference is in how they are built and how they behave. A polytunnel is a galvanised steel frame of hoops and a ridge, covered by a single sheet of polythene pulled over the top and anchored at the base2. A greenhouse is a glazed or panelled structure. If you are deciding between the two, the questions that matter are how much space you have, how much of the year you want to grow, and how much management you will put in.
The single most useful thing to know before you choose is that a polytunnel goes straight onto cleared soil. The only preparation is a simple site clearance, and the cover is buried in a trench around the outside of the frame2. That makes it a cheaper, more forgiving structure to site than something that needs a hard standing, though base plates are available for fixing to concrete or flags2. A polytunnel is a two person job, and many customers build a standard garden tunnel over a weekend2.
The second thing to know is that a polytunnel changes your watering. Plants under cover do not receive rainfall, so you must meet all their water needs yourself3. In August that can mean endless watering to keep everything fed and watered4. Plan for that before you buy, whether with a hose, an overhead irrigation kit or gutters feeding a water store.
Polytunnel or greenhouse: how each one behaves
The two structures differ most in how the cover works and what that means for the growing space underneath. A polytunnel is not supplied with a shaped cover: a one-piece polythene sheet is pulled over the frame2. The frame itself is sections of Z35 high tensile galvanised steel hoops placed at regular intervals and held together with steel stabilisers and a ridge2. The maker uses a simple clamping system almost universally throughout the structure, which allows fully adjustable fixing without worrying about using the wrong bracket2. Frames are galvanised steel, with pressure-treated timber for doors and base rails5.
A greenhouse, by contrast, is a rigid panelled structure. The practical consequence is that a polytunnel gives you a large, cheap, flexible volume of covered ground, while a greenhouse gives you a smaller, more controlled space. Both extend the season: the maker of one domestic range says the growing season is extended so you are still picking fruits and vegetables late into the autumn and can plant earlier in the year6. Independent guidance notes that greenhouses and polytunnels give sheltered growing space but need extra insulation to prevent deep frost penetration, using deep pots or grow bags, or creating a growing bed7.
What each one suits depends on scale and ambition. Narrow polytunnels of 6ft (1.83m) and 8ft (2.44m) suit small gardens and beginners getting started5. Small polytunnels are described as ideal for beginner gardeners, small gardens or allotments, seasonal growing or propagation8. Medium sizes of 12ft to 14ft wide are pitched at keen hobby growers, families growing food year-round, large gardens or shared allotments, and allow multiple beds, a double-path system, growing in the ground, staging or raised beds, and dedicated zones for propagation, potting and trellising5. Large kits of 16ft to 30ft wide are best suited to commercial growers, market gardens, schools, community gardens or farms8.
| Consideration | Polytunnel | Greenhouse |
|---|---|---|
| Cover | One-piece polythene sheet pulled over the frame2 | Rigid glazing or panels |
| Base | Straight onto cleared soil, cover buried in a trench2 | Can sit on soil or a hard standing |
| Build | Two person job, often a weekend for a standard garden tunnel2 | Not covered by these sources |
| Season | Extends picking late into autumn and earlier planting6 | Sheltered growing space, needs extra insulation against deep frost7 |
| Best fit | Small gardens and beginners at 6ft to 8ft; families and allotments at 12ft to 14ft; commercial at 16ft to 30ft5 | A controlled space for a smaller area |
If you are still working out where covered growing fits into your plans, the section on polytunnels and greenhouses sets out the wider picture, and growing your own vegetables covers the beds and crops that go around it.
A polytunnel goes straight onto cleared soil
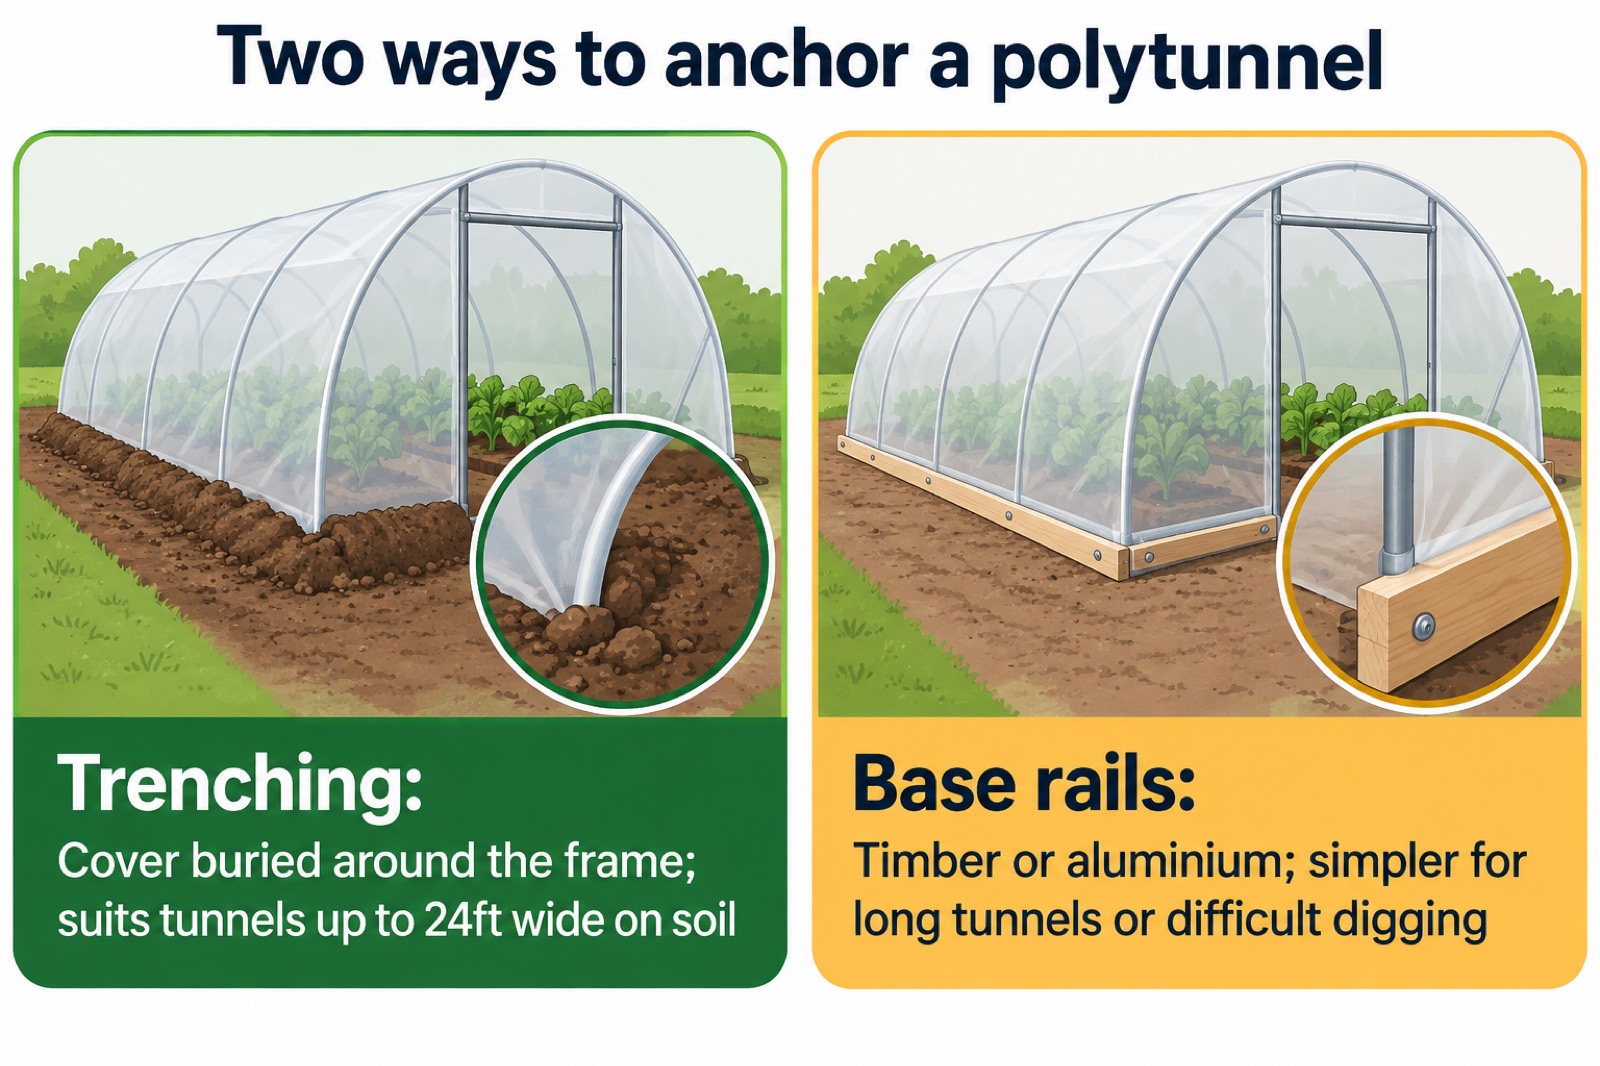
The appeal of a polytunnel for an ordinary household is that it does not demand a builder or a concrete pad. Polytunnels are normally placed straight onto a soil base, with the only preparation being a simple site clearance2. The standard fixing method is trenching: a trench is dug around the outside of the framework and the one-piece cover is buried into it2. This trenching method is suitable for all polytunnels up to and including 24ft wide constructed on a soil base2.
That said, the site still needs thought. Check access before you commit: make sure you have enough space to bring compost bags, tools or wheelbarrows through the doors and to move around all four sides of the structure5. A polytunnel you cannot walk around is a polytunnel you will struggle to maintain.
If your ground is not soil, or digging is impractical, there are alternatives. Base Plates are used for fixing polytunnels to a hard standing base such as concrete or flags2. Anchor Plates are used for fixing polytunnels into a soil base and replace the need for concrete2. Base rails, available in timber or aluminium, are a popular choice if building a large polytunnel or when the tunnel is going on rocky ground9. They are adjustable to allow for cover tensioning, helping you achieve a drum tight finish9.
Building a polytunnel: a weekend job for two people
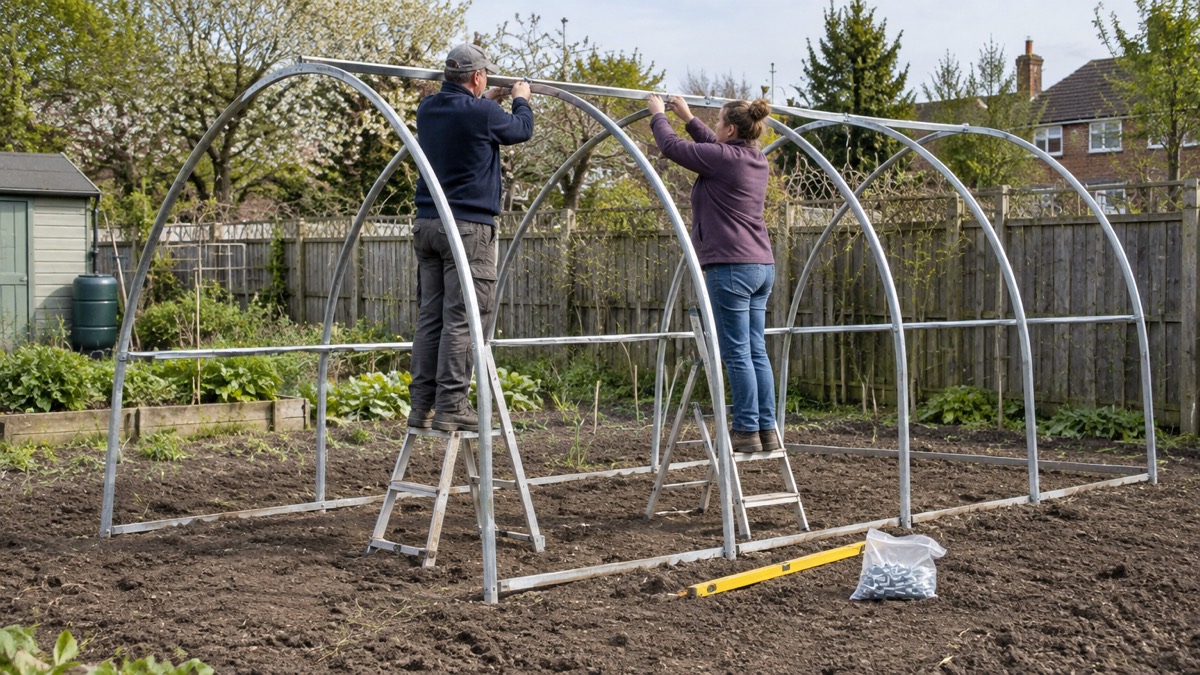
Building a garden tunnel really is a two person job, so invite a friend to join you2. Many customers can build a standard garden tunnel over a weekend, though there are many factors that determine how long it takes2. For a larger structure, one maker says a 12ft x 25ft tunnel can be constructed in a day by knowledgeable constructors, but it would be prudent to pencil in two days for a first-time constructor6.
The kit contains what you need to get going. A standard polytunnel kit gives you the frame, timber ends and door, anti hot spot tape and polythene cover in one package8. Small garden kits come with a hinged door at one end and a dummy door at the rear as standard8. A garden polytunnel is supplied as standard with a single hinged door at the front and a dummy door, which is a sealed unit, at the back9.
The build follows a sequence. For a 6ft wide garden polytunnel using the trenching method, the steps are: prepare the site, install the foundation tubes, fit the hoops, ridge bar and corner stabilisers, build the timber ends and hang the door, apply anti hot spot tape, then fit the cover8.
Tools for a polytunnel
For a standard polytunnel you will need a tape measure, spade, large hammer and claw hammer, spirit level, two 13mm spanners, marker pen, battery drill, 9mm and 5mm drill bits, Phillips screwdriver, wood saw, string line, sharp knife and a timber drift2. If your polytunnel includes aluminium rails, ventilation screens or sliding doors, you will also need a hacksaw or angle grinder, a rubber hammer and a flathead screwdriver2. One maker's list for a 12ft x 25ft tunnel adds pegs and string for marking out, a lump hammer, a drill and metal bits, spanners or a socket set, scissors or a Stanley knife, a saw and a step ladder6.
Drilling self-drill screws
Self-drilling screws go into the steel frame, and the method matters. Start slowly, and once the screw has begun to bite, press firmly and increase speed2. Drilling a small pilot hole in the steel first may help, and extra pressure may be required on harder steel such as the weld2.
Fitting the cover on a calm day
The cover is the part of the build where the weather decides your day. A warm day is preferable but not essential; a calm day is without doubt necessary, as you are effectively opening a large sail2. One maker advises checking a windy weather forecast map before fitting the polythene cover, calling it an invaluable tool6.
Once on, the cover should be as taut as possible2. The pleats in the polythene allow excess to be neatly gathered and spread out while keeping the cover as taut as possible2. The polythene usually only hangs halfway down the ends when the cover is centralised over the frame, coming around the ends only to the door posts2.
Covers slacken over time, often as the framework settles. If yours does, take action to re-tension the sheet on a non-windy day and ensure your cover is taut again before a storm hits9.
Anchoring: trench or base rails with anchor plates
There are two ways to hold a polytunnel down, and the choice affects how you build and how you extend later.
- Trenching. A trench is dug around the outside of the framework and the one-piece cover is buried into it. This is the standard method and suits all polytunnels up to and including 24ft wide on a soil base2.
- Base rails with anchor plates. Base rails, in timber or aluminium, are a simpler option the greater the length of the polytunnel or when digging conditions are difficult2. If base rails are used, Anchor Plates are necessary to secure the steel frame into the ground to prevent it lifting, even in the most severe weather conditions2.
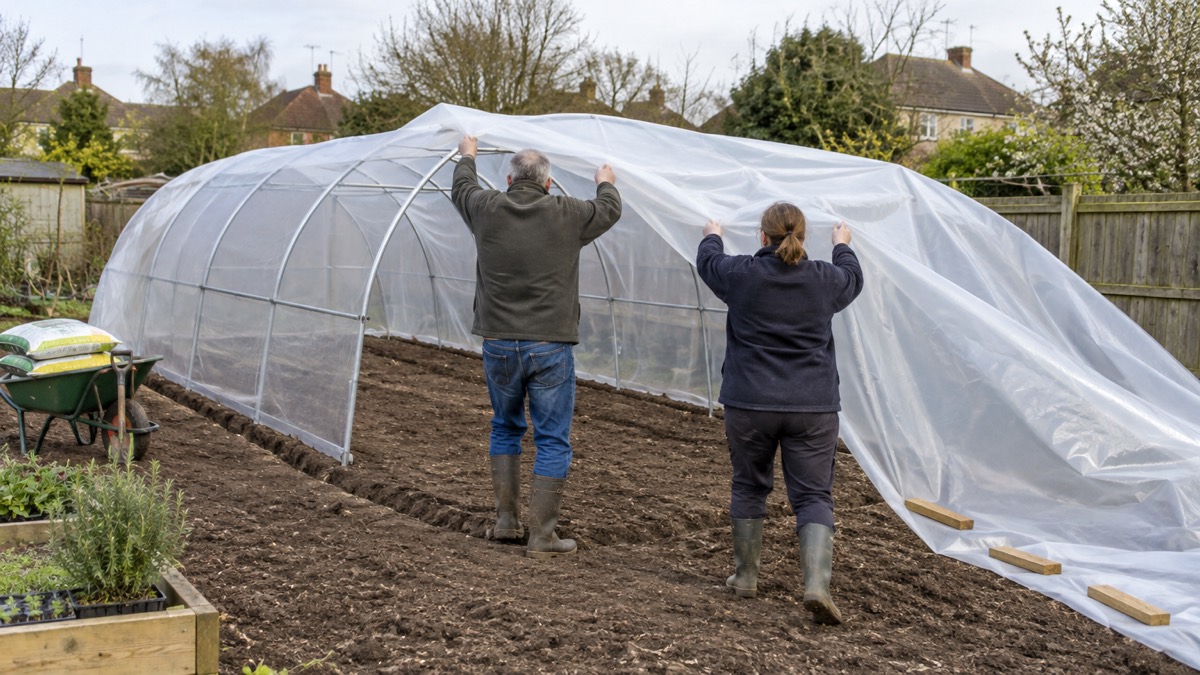
Whichever you choose, bury any surplus polythene. Even when using base rails, burying surplus polythene ensures the base of the polytunnel is sealed against pests and draughts2. Then lay the surplus along the ground and cover it in chippings: this prevents weeds growing up to the sides of the tunnel and keeps strimmers away from the polythene2.
Where a polytunnel should face: side on to the wind
Orientation is one of the few decisions you cannot change later without rebuilding. The maker recommends constructing a polytunnel side on to the prevailing wind, allowing the wind to travel up and over the curved roof2. That is the whole principle: the curve sheds the wind rather than catching it.
Doors matter too. Hinged doors are designed to be opened inwards, and this prevents wind damage when left open2. They can be opened outwards by fixing the hinges in the desired position2. Sliding doors slide open on the outside of the tunnel and sit flush to the polytunnel9.
Ventilation is the other half of the wind question. A side rail is clamped onto the polytunnel hoops with ventilation netting fixed between the side rail and ground level, providing airflow9. On one 6ft model, to select a ventilation screen you must first select an aluminium or timber side rail kit on that side10. The net used to replace the lower portion of the cover is a 50% shade ventilation net11.
Shelter from wind is also a growing benefit. Borage should thrive in a polytunnel because it likes a sheltered location out of strong winds that can knock it over12. Rosemary grown under cover is easier to regulate for water and waterlogging, but keep it well ventilated so humidity does not rise too high13.
Growing under cover: water, pollination and space
Once the structure is up, the management begins, and it is different from outdoor growing in three ways.
Water. In a polytunnel you must meet all the water needs of the plants, since they will not naturally receive rainfall3. August can mean endless watering to keep all plants watered and fed4. An overhead irrigation kit fits a polythene pipe to the roof with sprinklers on drop tubes placed at approximately every hoop, is manually operated, and connects to a garden hose (not supplied)14. On 14ft wide tunnels, two irrigation lines run along the length for full coverage to the edge, with the feeder pipe suspended on galvanised straining wires14. Gutters are another route: polytunnel gutters collect rainwater for watering crops and are useful for allotment growers without mains water, designed to be used with timber or aluminium side rails9. They are made from black rigid PVC and sold individually15.
Pollination. Wind cannot do the job as well inside, so aid pollination by tapping or gently shaking plants, and maintain good airflow3. Melons often need hand-pollination with a small brush between male and female flowers; restrict pollinator access until there are several flowers, otherwise the first fruit set can inhibit further production16.
Space and layout. Think carefully about companion plants and layout, so sweetcorn only shades other plants where this is desirable3. Sweetcorn usually needs a larger polytunnel given block planting and spacing needs3. Crop bars can support hanging baskets, canes, shade net, lighting and irrigation, and on tunnels greater than 10ft wide have additional support up to the hoops or ridge17.
What you can grow widens under cover. A polytunnel makes it much easier to grow peach trees successfully in our climate, even for more northerly gardeners18. Grapes can be grown with roots outside or inside, though watering needs differ and roots outside make maintenance easier19. Radishes can be harvested all year round with the season extension a polytunnel gives20. Kale is protected from the worst winter weather and keeps a good stock going until spring, and later sowings in July or August are sometimes possible with a polytunnel21. Hydroponic crops are grown under cover in a glasshouse or polytunnel, and the season can be extended with extra heat and light22.
Keeping a greenhouse from overheating
A greenhouse heats up faster and further than a polytunnel, and summer management is mostly about stopping it cooking its contents. Add shading to the roof to try to prevent temperatures climbing quite so high23. One gardener reported their greenhouse reaching up to 40 degrees and was looking for sun blinds23.
Crops differ in what they tolerate. Peppers and aubergines appreciate hot temperatures, but tomatoes and cucumbers prefer it slightly cooler23. That argues for zoning, or for shading part of the roof rather than all of it.
Ventilation is the first defence. Keep doors open and create good ventilation as the weather begins to warm24. In a polytunnel, a polythene cloche can be used inside a larger tunnel as double glazing to reduce heating costs25, which is the reverse problem: keeping warmth in rather than out.
For winter growing, independent guidance is clear that greenhouses and polytunnels need extra insulation to prevent deep frost penetration, using deep pots or grow bags, or creating a growing bed7. Under cover you can keep winter salad leaves cropping, protected from possible frosts for a slightly longer season, and sow basil, dill and parsley under cover in November26.
Size, access and getting help
Choosing a size is the decision most people get wrong. If possible, go one size bigger than you initially think, as many growers quickly fill their space with crops and equipment5. For an allotment, a 12ft wide structure may be worth choosing if space allows, giving flexibility for a range of crops, watering systems, tools and a central or double-path system5. As a comparison, a 6ft x 20ft tunnel gives two and a half times the growing space of a 6ft x 8ft structure6.
Moving or extending is best done when the polythene cover requires replacing, to keep costs down; extending needs a new larger cover2. Small garden polytunnels are built to the same standards and materials as larger structures, so a compact tunnel is not a lesser one5.
For pests, remember that doors and vents must be open in summer, so a row cover or cloche with insect-proof mesh over vulnerable crops is a good idea even inside a polytunnel21. Chervil grown in a polytunnel may make it easier to keep slugs and snails from having a feast24. If you keep poultry alongside your growing space, one inch (2.5cm) square mesh over ventilation areas helps keep out all but the smallest vermin, and a vertical sliding pophole closed at night prevents fox damage27.
If you are new to growing, the seed sowing equipment checklist and the guide to extending the growing season without a greenhouse are useful companions, as is sowing seeds indoors and outdoors and vegetable pests and diseases. For water storage to feed the tunnel, see water butts and rainwater harvesting.
Sources (27)
- Growing Year-Round, CAT, 2025-07-02
- Construction FAQs, Premier Polytunnels, 2026-11-04
- Sweetcorn, First Tunnels, 2026-01-14
- Summer Growing Guide, First Tunnels, 2026-01-26
- Choosing Your Polytunnel Size, Premier Polytunnels, 2026-11-04
- First Tunnels, First Tunnels, 2026
- Vegetables All Year Round, Garden Organic, 2026-10-29
- What's Included in a Standard Kit, Premier Polytunnels, 2026-11-04
- What Accessories Do I Need, Premier Polytunnels, 2026-11-04
- 6ft Wide Polytunnel, Premier Polytunnels, 2026-11-04
- 12ft Wide Polytunnel, First Tunnels, 2026
- Borage, First Tunnels, 2026-09-29
- Rosemary, First Tunnels, 2026-01-14
- Overhead Irrigation Kit for Garden Polytunnels, Premier Polytunnels, 2026-10-29
- Polytunnel Gutter, Premier Polytunnels, 2026-11-04
- Melon, First Tunnels, 2026-01-14
- Crop Bar for Garden Polytunnels, Premier Polytunnels, 2026-11-04
- Peach, First Tunnels, 2026-01-14
- Grapes, First Tunnels, 2026-01-14
- Radish, First Tunnels, 2026-01-14
- Kale, First Tunnels, 2026-01-14
- Growing Crops with Hydroponics, RHS, 2026
- Growing in Raised Beds, Harrod Horticultural, 2026-11-04
- Chervil, First Tunnels, 2026-01-14
- Polythene Cloche, Premier Polytunnels, 2026-11-04
- Autumn Growing Guide, First Tunnels, 2026-01-26
- Housing, Equipment and Feed, Poultry Club of Great Britain, 2026-11-04
 Heated vs Unheated Propagator
 Hot Composter vs Cold Bin
 Pressure Canner vs Water Bath
 Wormery vs Bokashi Bin