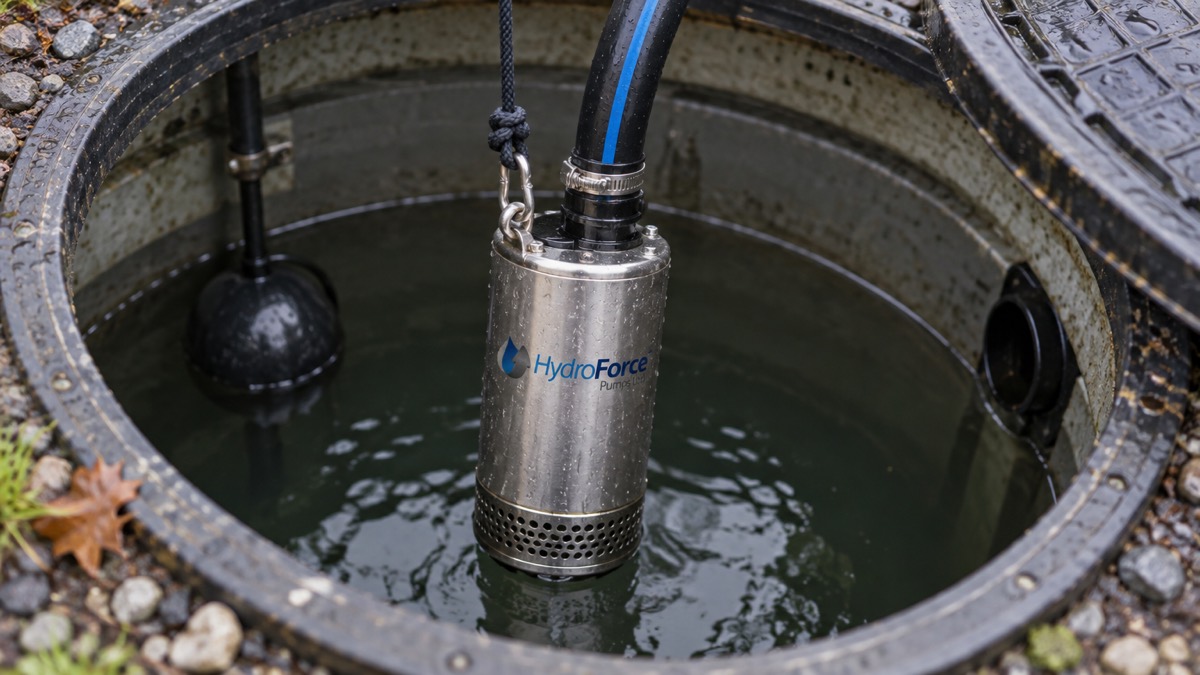
The HydroForce Series 3 is a submersible clean water pump for moving stored rainwater from a tank to a tap, hose or appliance. The maker's product page gives the headline figures: it delivers up to 3.5 bar and over 2500 litres per hour using a 1 inch connector, and it uses 800 watts at 220-240 volts AC1. For context, the same page notes that household pressure is around 2.5 to 4.0 bar, so the pump is built to sit in the same range as a normal mains supply1.
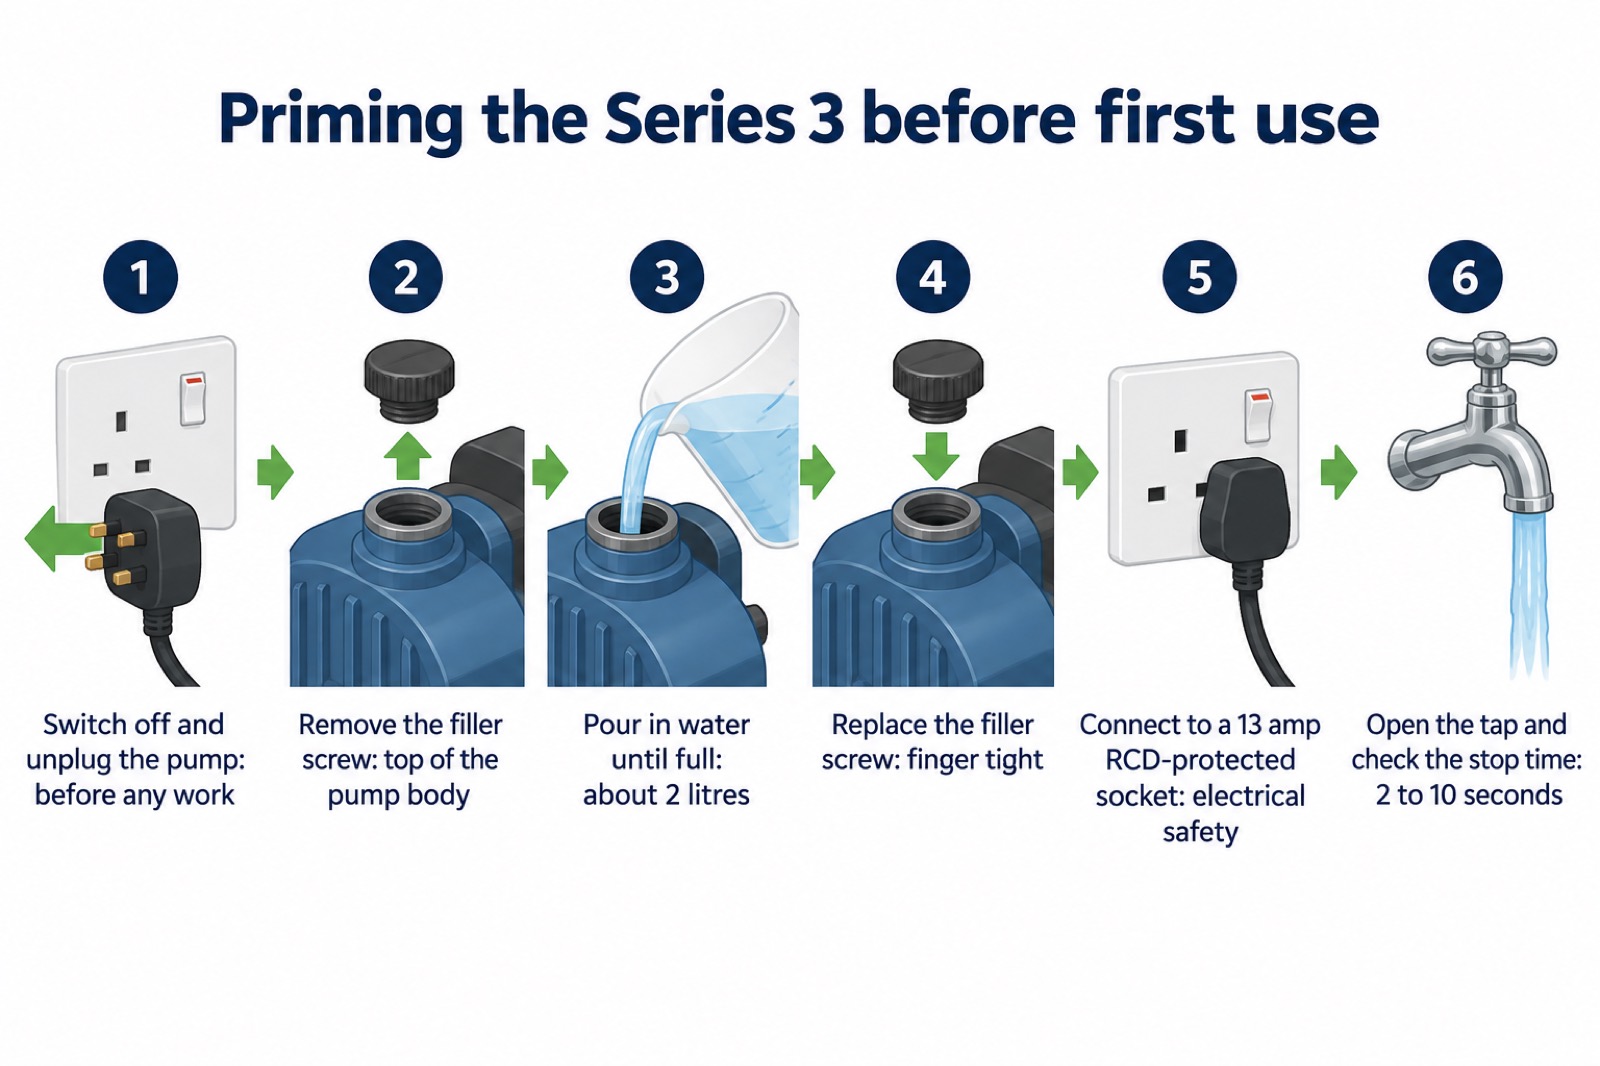
Before you run it for the first time, the pump must be primed. The maker's manual says to remove the filler screw, pour water into the body of the pump until full (about 2 litres) and replace the screw2. It must be connected through a 13 amp RCD-protected socket, and it is a clean water pump only: nothing with debris particles bigger than 2mm, and never oils or flammable liquids3.
This page sets out what the pump can do, how to install and prime it, how to run and store it safely, and what to do when it stops, hunts or keeps tripping the RCD. It is written for a household fitting one to a rainwater tank, not for a commercial installation.
What the Series 3 is and what it suits
The maker describes the Series 3 as an electronically-controlled, pressure-sensitive, submersible, centrifugal roto-dynamic pump with no reciprocating parts5. In plain terms, it is a pump that sits in or beside a water tank and switches itself on when you open a tap or hose, then off again when the flow stops. The maker's product page says it is suitable for total immersion in the water tank or for external connection to the tank above ground6.
It is designed for rainwater systems. The maker's product page says that if connected to a hose or tap, the pump will automatically start to pump water when the tap or hose is turned on1. It features a self-controlling pressure switch, dry run protection and a non-return valve6. The bodywork is an Italian-styled shape which is stable in the floor of a water tank1.
The pump is one part of a rainwater system. Rainwater is collected from the roof, filtered, stored in a tank and then re-used within the home and garden7. A standard system involves a catchment area (usually your roof), gutters and downspouts, a filtration system, a storage tank and a distribution system (pump)8. If you are still working out how the parts fit together, our guide to how a rainwater system works and our page on pumps for rainwater tanks set out the options.
The Series 3 suits a household that wants to move stored rainwater to a garden tap, a hose or an appliance such as a washing machine or toilet supply. It is not a dirty water or drainage pump. The maker's installation instructions for a related rainwater system state plainly: "Do not use the pump supplied to empty a dirty underground tank"9. If your tank collects silt and debris, that is a job for a different kind of pump.
Specifications
The figures below come from the maker's product pages and manual. Where a retailer lists a specification, the maker's figure is given.
| Specification | Figure | Source |
|---|---|---|
| Pump pressure (nominal) at outlet | 3.5 bar | 2 |
| Flow rate | over 2500 litres per hour using a 1 inch connector | 1 |
| Power consumption | 800 watts | 1 |
| Electrical supply | 220-240 volts AC at 50Hz | 3 |
| Fuse and socket | 10 or 13 amp fuse and RCD mains socket | 10 |
| Connection cable | 10m H07RN-F | 10 |
| Outlet port | 1 inch (25mm) female BSP with push-fit connector for 1 inch (25mm) MDPE pipe; 1 1/4 inch (32mm) connector option by special order | 3 |
| Maximum head (nominal) | 35 metres | 5 |
| Maximum suction | 3 metres | 5 |
| Dimensions | 565mm high, 185mm wide, 260mm long | 11 |
| Weight | 13.1 kg | 11 |
The maker's product page also gives a 5 metre cable length1, while the maker's leaflet lists a 10m H07RN-F connection cable10. The two documents disagree on cable length, so check the cable supplied with your pump before planning where it will sit.
The pump is compliant with the safety requirements of the Machine Directive 89/392/EC and amendments, the Low Voltage Directive 73/23/EC and the Electromagnetic Compatibility Directive 89/336/EC and amendments3. Each pump is tested individually at the Peterborough factory, pumping water through a pre-determined cycle, with performance automatically logged against its bar code number10.
Priming before first use
Priming is not optional. The maker's manual says the pump must have water in it before first start: remove the filler screw, pour water into the body of the pump until full (about 2 litres) and replace the screw2. The installation sheet for a related rainwater system repeats that it is essential the pump is primed before use, and points to the pump installation manual supplied with the pump9.
The maker's warranty conditions make priming a condition of cover. The warranty applies if instructions are complied with, the pump has been used for its designed applications and it has not been disassembled. It is obligatory to prime the pump by removing the Filler screw and filling the body of the pump (approx. 2 litres of water) then replacing the Filler screw4.
If the pump is drawing water from a lower level, the maker advises fitting a non-return valve (not supplied) on the inlet pipe at its lowest point, and filling the pipe with water before first pumping3. The maximum suction is 3 metres5.
Electrical safety: a 13 amp RCD-protected socket only
The pump runs on mains electricity, so the electrical rules matter as much as the plumbing. The maker's manual states the electrical use is 220-240 Volts AC at 50Hz, 800 watts requiring a 13 amp RCD-protected socket3. It adds that the pump must be connected through an RCD protected mains electric socket to ensure electrical safety4. The maker's leaflet lists a requirement for a 10 or 13 amp fuse and RCD mains socket10.
An RCD (residual current device) is the safety switch that cuts the power if current leaks to earth. If your outdoor socket is not RCD-protected, have a qualified electrician fit one before the pump is used. Do not run the pump from an extension lead that bypasses the RCD.
The maker also warns of water pressure: ensure your face or body is not in line with the pump output when turning the pump on2. At up to 3.5 bar, a sudden jet can sting or injure, particularly at close range.
The pump is not for use by anyone under 16 years of age nor for anyone who has not read these instructions3. Keep children and anyone unfamiliar with the pump away when it is running.
Clean water only: nothing with debris over 2mm
The Series 3 is a clean water pump. The maker's manual says: "This pump can only be used to pump clean water. It is forbidden to pump oils, explosive or flammable liquids or water with debris particles bigger than 2mm"3. The same limit appears in the installation instructions: it is forbidden to pump oils, explosive or flammable liquids or water with debris particles bigger than 2mm2.
That limit has practical consequences for a rainwater tank. Roof-collected water carries grit, moss and leaf fragments, so filtration upstream matters. The maker states that the pump is for clean water only and that it is forbidden to pump water with debris particles bigger than 2mm2. A standard rainwater harvesting system includes a filtration system between the gutters and the tank, so rain is directed through a filter before it is stored for later use3.
If debris does get through, it can block the non-return valve in the inlet. The maker states there are no user-serviceable parts, although debris or other blockage can be removed from the non-return valve in the inlet of the pump after consulting the instructions on the web site3. Do not open the pump body beyond that; disassembly voids the warranty4.
For the wider picture on keeping grit and leaves out of a tank, see our guide to rainwater filters and keeping a rainwater system clean.
Fitting the inlet, outlet and pipework
The inlet side needs thought before the pump goes in. Fit a cartridge filter to the input of the pump, remove the filler screw, fill with water (about 2 litres) and replace the screw2. If the pump is drawing water from a lower level, fit a non-return valve (not supplied) on the inlet pipe at its lowest point, and fill the pipe with water before first pumping3. The maximum suction is 3 metres5.
On the outlet side, the maker's installation sheet specifies connecting the outlet using rainwater marked pipe of diameter between 25mm or 32mm9. The pump is supplied with a 25mm outlet connector and must be primed before use9. The outlet port itself is a 1 inch (25mm) female BSP provided with a push-fit connector for 1 inch (25mm) MDPE pipe, with a 1 1/4 inch (32mm) connector option by special order3.
| Connection | Specification | Source |
|---|---|---|
| Inlet filter thread | 1 inch BSP male | 3 |
| Outlet port | 1 inch (25mm) female BSP | 3 |
| Supplied outlet connector | 25mm push-fit | 9 |
| Pipe diameter | 25mm or 32mm rainwater-marked pipe | 9 |
| Maximum suction | 3 metres | 5 |
| Maximum head | 35 metres (nominal) | 5 |
For the labelling rules that apply to rainwater pipework, see our page on what pipe to use for rainwater and labelling rules.
Checking the stop time after installation
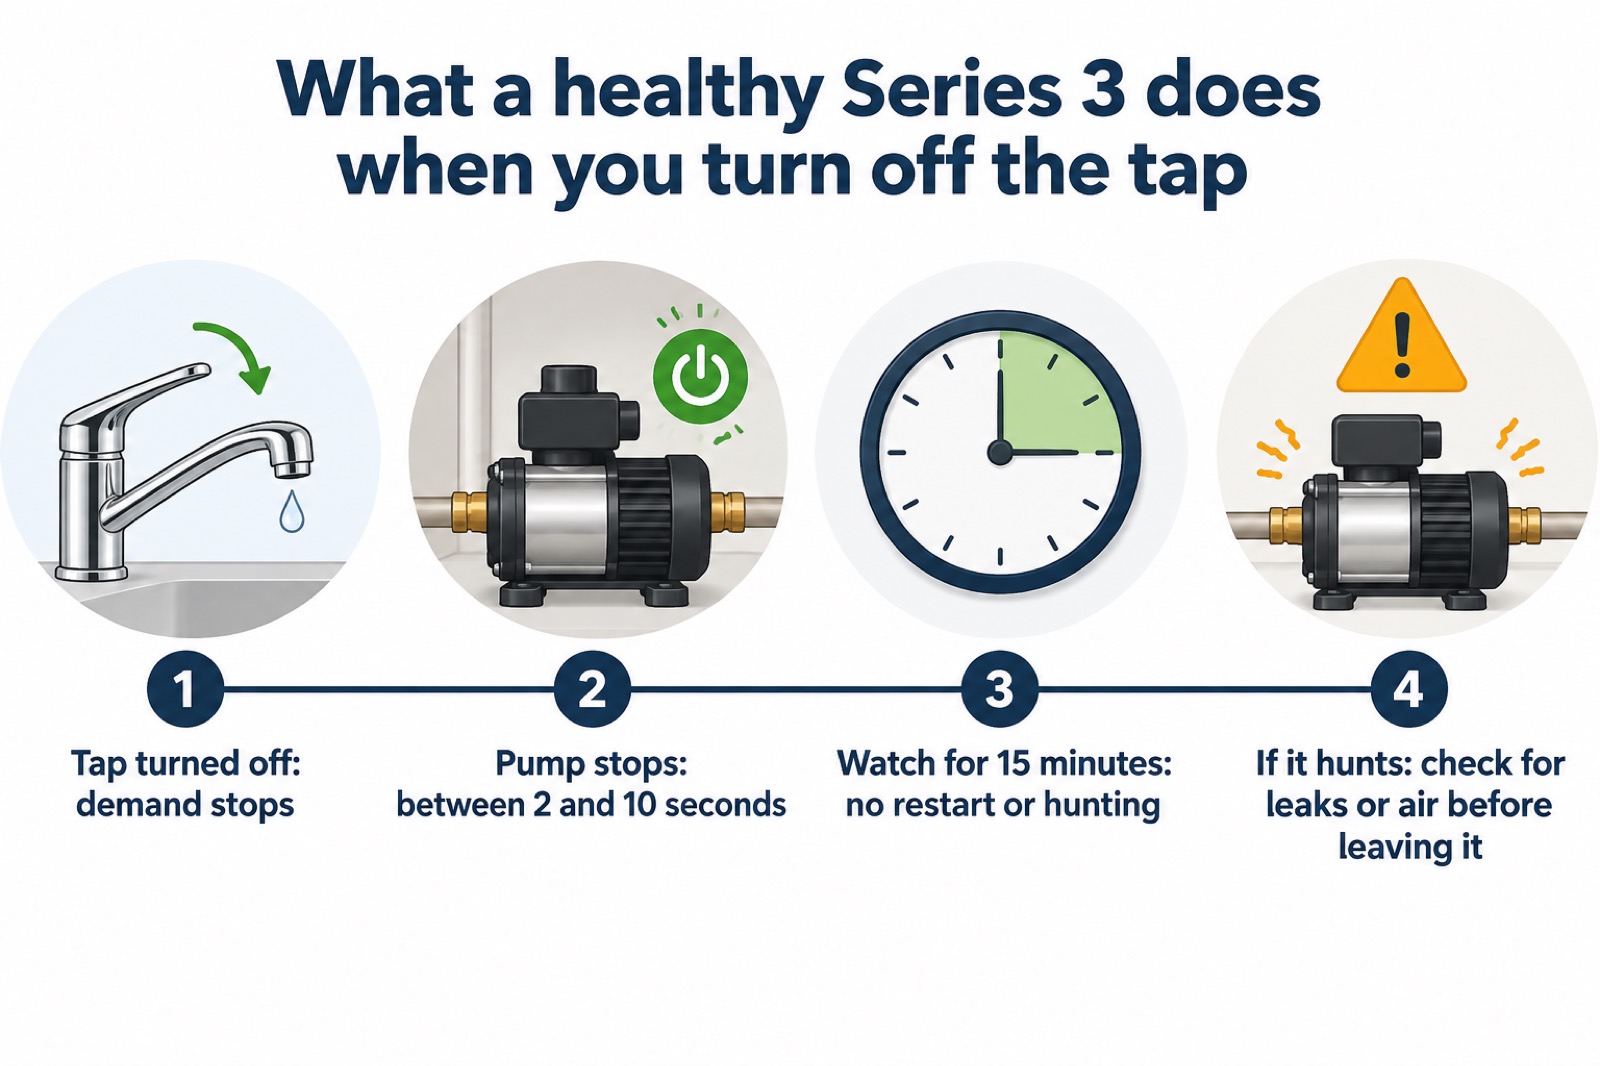
Once the pump is plumbed in and primed, test how it behaves when the demand stops. The maker's manual says: with the top of the underground tank open, turn off the tap and count the seconds till the pump turns off; it should be between 2 and 10 seconds3. Then shut off the tap, observe the pump stopping, and ensure it does not start again or hunt within 15 minutes3.
That check catches two common faults early. A pump that runs on for far longer than 10 seconds may be losing pressure somewhere in the pipework. A pump that restarts repeatedly, or hunts, within the 15 minute window may have a leak, a stuck non-return valve or air in the system.
When the pump stops or keeps restarting
The Series 3 has several automatic protections, and knowing how they behave helps you tell a normal shutdown from a fault.
Dry run protection. When no water is detected for 8 seconds, the pump is turned off by the printed circuit board (PCB) to protect the motor and pump from burning out3. If the tank has run low, the pump will stop and wait. Refill the tank and it will try again on its automatic reset schedule.
Automatic reset. After a dry run stop, the pump resets automatically after a period of 30 minutes. If water is still not detected, subsequent reset periods are 1.5 hours, 3 hours, 7 hours, 12 hours, 24 hours then back to the beginning of the cycle3. This is why a pump on an empty tank may seem to come back to life hours later.
Overheating. A thermal switch, not connected to the PCB, turns the pump off when the motor overheats. It resets when cool, which may take several hours3. The maker's troubleshooting advice is to unplug the pump and leave it to cool down for half an hour; the switch resets automatically as it cools3.
Hunting. If the pump starts and stops repeatedly after the tap is closed, the maker's check is to ensure it does not start again or hunt within 15 minutes4. Persistent hunting points to a leak or a pressure problem in the pipework, not a fault in the pump itself.
Tripping the RCD. If the pump motor does not run, or the pump repeatedly trips the RCD, the maker's instruction is to disconnect it and contact the supplier4. Do not keep resetting the RCD and trying again.
Running, storing and looking after the pump
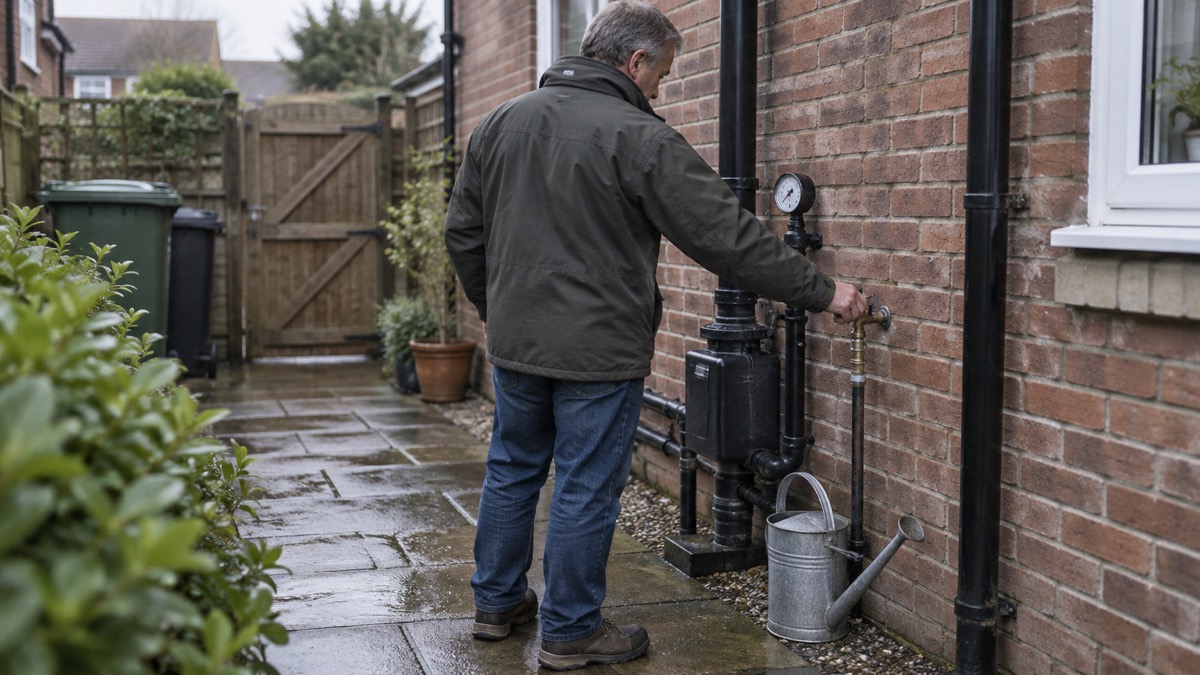
The pump is designed to be left connected. The maker's manual states the pump can be left plugged in all of the time2. Leave it turned on at the mains so it runs when water is needed and turns off when all outlets are closed2. Because it starts automatically when a tap or hose is turned on, there is no need to switch it on and off by hand1.
When you do need to move it, use the handle and the nylon cord, never the power cable2. Disconnect it from the power supply before any work, and when handling it while connected avoid all contact with water2. At 13.1 kg it is a two-handed lift for most people11.
The pump's sealing design is intended to keep water out of the motor. An alloy bulkhead, pressure release gap and twin chamber design prevent ingress of water to the motor, electrical components and to bearing oil; a double bearing seal prevents egress of bearing oil; and the alloy bulkhead dissipates motor heat to water in the second chamber3. That design is why the pump can be fully immersed, but it does not make it safe to handle while connected to the power supply2.
For winter, if the pump is outside or in an exposed tank, follow the maker's instruction that the pump is not for use by anyone who has not read the instructions, and keep the instructions to hand before any work2. Our rainwater system winter checklist covers the wider job of protecting tanks and pipework from frost.
Support, warranty and where to get help
The warranty applies if instructions are complied with, the pump has been used for its designed applications and it has not been disassembled4. Priming is part of that condition: it is obligatory to prime the pump by removing the Filler screw and filling the body of the pump (approx. 2 litres of water) then replacing the Filler screw4.
The maker supplies high-quality image-based multi-lingual instruction manuals with the pump10, and the pump carries UK Patent GB1113259.410. If you have lost the manual, the maker's website carries the installation instructions and leaflet.
If the pump repeatedly trips the RCD, or the motor does not run, disconnect it and contact the supplier4. Do not attempt repairs beyond clearing a blockage from the inlet non-return valve after consulting the maker's instructions3.
For the wider context of what harvested rainwater can be used for, and how a pump fits into a household system, see our guides to what harvested rainwater can be used for and pumps for rainwater tanks. The maker's own page is at HydroForce.
Sources (11)
- HydroForce product page, HydroForce Pumps, 2026-11-02
- HydroForce pump installation instructions, HydroForce Pumps, 2021
- HydroForce pump leaflet, HydroForce Pumps, 2021
- HydroForce pump installation instructions (current), HydroForce Pumps, 2021
- EasyHydro Series 3 specification, Ecosure, 2026-11-04
- HydroForce home page, HydroForce Pumps, 2026-11-02
- Rainwater harvesting FAQ, Rainwater Harvesting Ltd, 2025-11-06
- Essential questions answered, Rainwater Harvesting Ltd, 2026-04-09
- Rain Director Carat quick install guide, Rainwater Harvesting Ltd, 2021-11
- HydroForce pump leaflet (current), HydroForce Pumps, 2011-10
- 1500 Litre EasyConnect rainwater harvesting system, Ecosure, 2026-11-04